Parental Involvement: Medium

  • Spooky Mystery Box

    Spooky Mystery Box

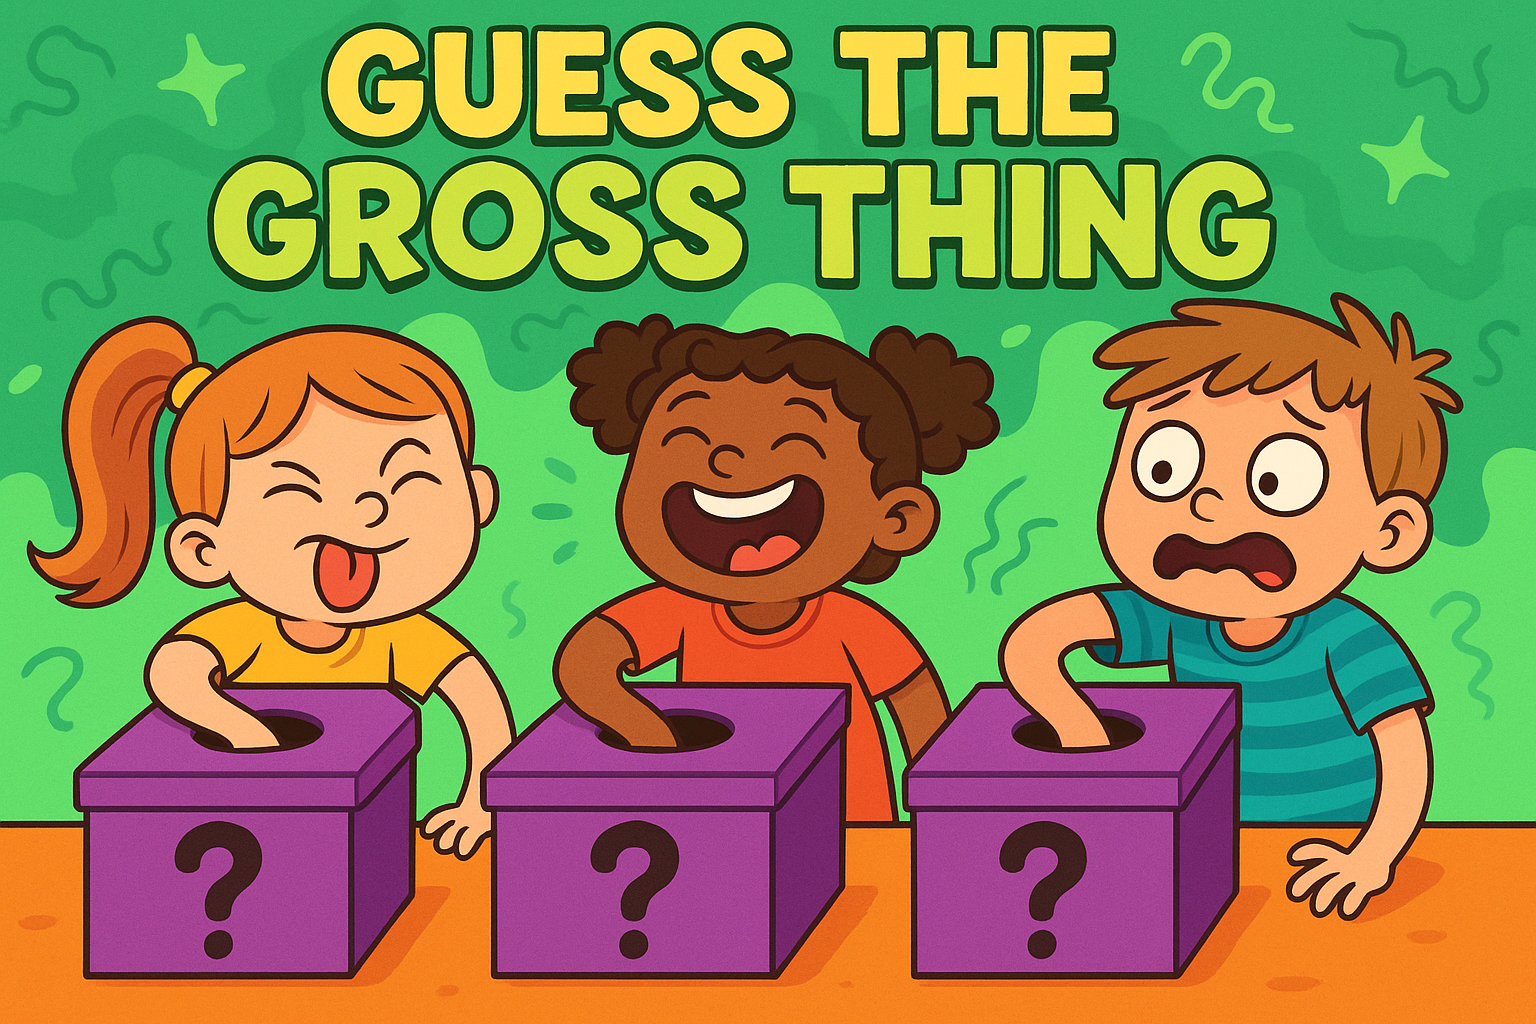
    This silly sensory game is perfect for Halloween parties or rainy days.

    Children reach into hidden boxes and try to guess what’s inside – from “witch’s worms” (spaghetti) to “monster eyeballs” (peeled grapes)! It’s full of laughter, surprises, and a little bit of harmless gross-out fun.


    Materials

    • Several small cardboard boxes or shoeboxes
    • Small bowls or containers
    • Cooked spaghetti (for “worms”)
    • Peeled grapes (for “eyeballs”)
    • Jelly or slime (for “goo”)
    • Dry rice or lentils (for “bugs”)
    • Old socks, tissues, or similar soft textures
    • Paper and pens for guessing
    • Optional: cloth or paper to cover the boxes

    Tools

    • Scissors or craft knife (for adults to cut holes)
    • Spoon or tongs for filling containers

    Steps

    1. Cut a hand-sized hole in the side of each cardboard box.
    2. Place a bowl or container inside each box, filled with a different “gross” texture.
    3. Cover the boxes with paper or cloth so the contents can’t be seen.
    4. Label each box with a number.
    5. Ask each player to take turns reaching inside and guessing what they feel.
    6. Write down all the guesses, then reveal the answers at the end!

    Variations

    • Nature Edition: Use natural textures like damp leaves, pinecones, or mud instead of food items.
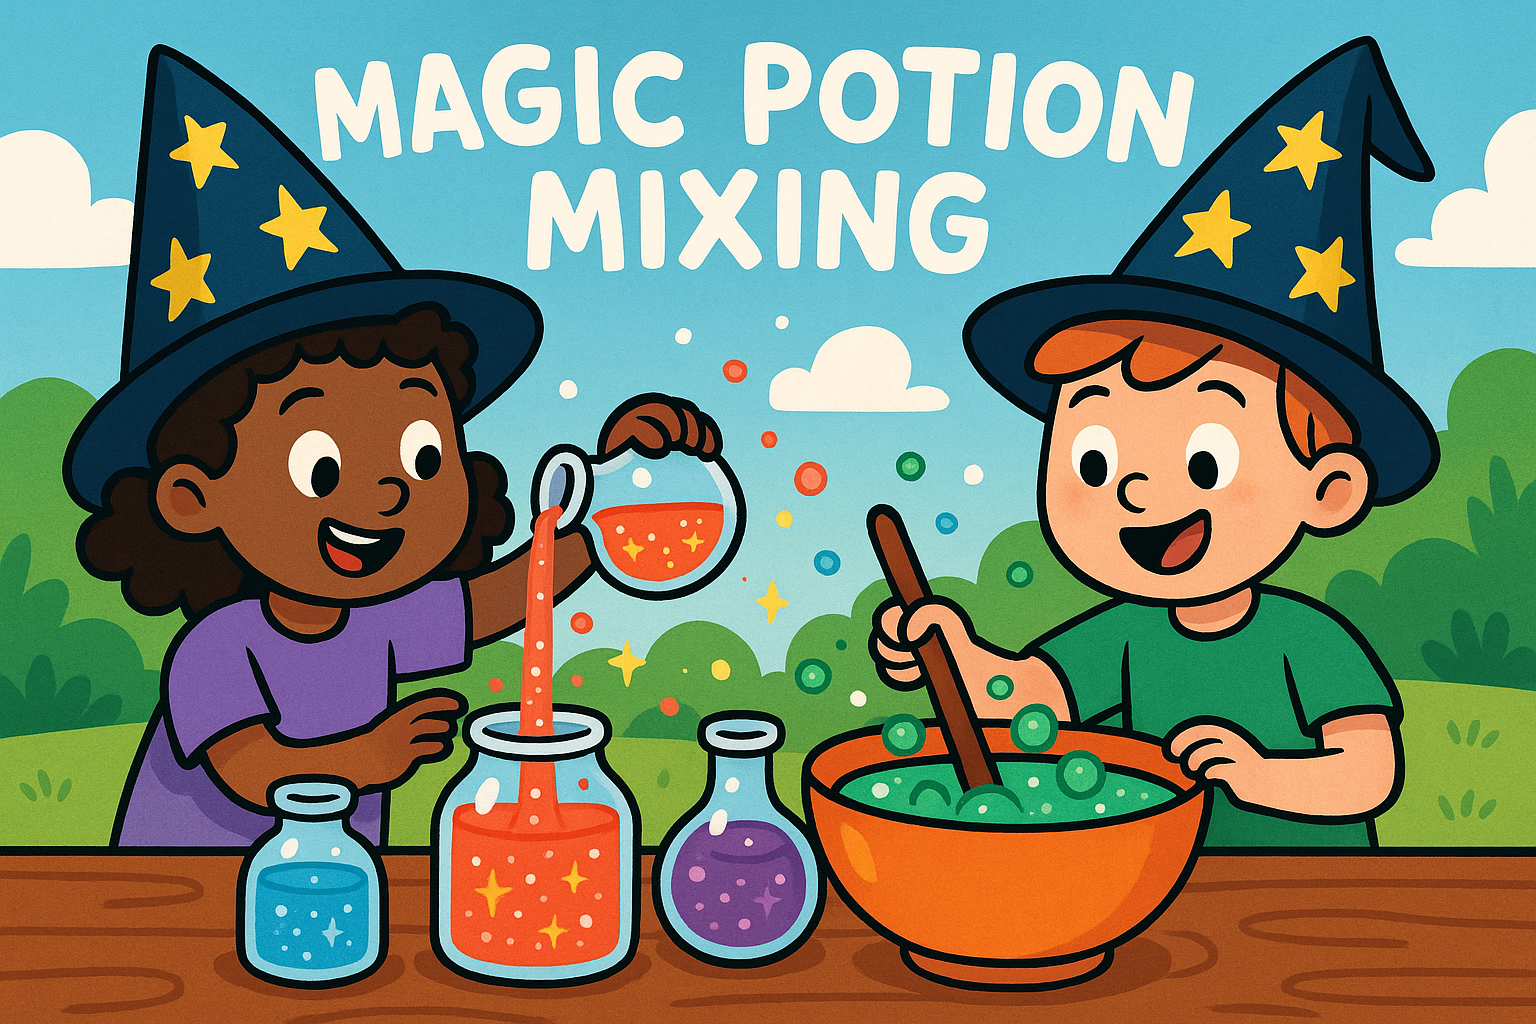
    • Story Mode: Turn the mystery into a themed challenge – e.g. “A wizard’s potion ingredients” or “Alien samples”.
    • Blindfold Challenge: Skip the boxes and have one person blindfolded while touching mystery items handed to them.

    Why It’s Great

    • Encourages sensory exploration – Helps children develop touch-based curiosity and descriptive language.
    • Builds confidence and humour – A gentle, funny way to explore “icky” feelings safely.
    • Perfect for group play – Encourages laughter, teamwork, and shared reactions.

    Safety Tips

    • Adults should cut holes and prepare any slippery or food-based items.
    • Avoid any ingredients children are allergic to, and wash hands before and after the game.
  • Toilet Roll Mummy Wrap

    Toilet Roll Mummy Wrap

    This fun Halloween classic is full of laughter and teamwork. Children take turns wrapping each other up in toilet paper to create the best or silliest mummy. It’s perfect for parties or family fun at home, and easy to tidy up afterwards.


    Materials

    • Several rolls of toilet paper (1–2 per team)

    Tools

    • None

    Steps

    1. Split into pairs or small teams. One person will be the mummy, and the others will do the wrapping.
    2. Give each team a roll of toilet paper.
    3. Start the timer for two minutes. Teams race to wrap their mummy from head to toe (leave space for breathing and seeing!).
    4. When time’s up, everyone stops wrapping and admires the results.
    5. Optional: Have a mini catwalk or photo moment for each mummy before unwrapping and recycling the paper.

    Variations

    • Speed Challenge: Add a time limit and see who can make the neatest mummy the fastest.
    • Spooky Parade: Play eerie music and have a mummy fashion show.
    • Glow Mummies: Add glow sticks or glow-in-the-dark tape for a night-time version.

    Safety Tips

    • Make sure children can breathe and see clearly through the wrapping.
    • Keep the floor clear to prevent slipping on loose paper.
    • Supervise younger children closely to ensure safe wrapping.

    Why It’s Great

    • Teamwork – Encourages cooperation and creative thinking in groups.
    • Laughter – Brings joy and silliness to Halloween celebrations.
    • Imagination – Helps children get into character and enjoy pretend play.

  • Pumpkin hunt

    Pumpkin hunt

    What you’ll need

    • Several small pumpkins (real, plastic, or paper)
    • Torches (one per child, if possible)
    • Optional: glow sticks, reflective tape, or LED tea lights
    • Outdoor space with safe boundaries
    • Optional: small baskets or bags for collecting
    • Optional: prizes or treats for each child

    Setup

    As dusk falls, hide the pumpkins around your garden, park, or other outdoor space. Choose spots that are safe but a little tricky—behind trees, under benches, or tucked beside fences. If using real pumpkins, you can add glow sticks or LED lights inside to make them glow.

    Before starting, set clear boundaries for where the hunt takes place and check the area for trip hazards. Give each child a torch and a quick safety talk about walking (not running) and sticking together.


    Steps

    1. Gather everyone and explain that they’ll be going on a spooky pumpkin hunt in the dark.
    2. Give each child a torch and, if you like, a small basket or bag for collecting pumpkins.
    3. Count down and let them start searching. Encourage teamwork and cheering when someone finds one.
    4. Once all the pumpkins are found, gather together to count them and celebrate. You could swap the pumpkins for small treats or prizes.

    Variations

    • Team play: Split into two groups and see who can find their set of pumpkins first.
    • Glowing clues: Leave glowing arrows or glow-stick trails leading to each pumpkin.
    • Mini challenge: Write numbers or letters on the pumpkins, and have children find them in order or spell a word when all are collected.
    • Indoor version: Turn off the lights and hide small paper pumpkins around the house instead.

    Safety Tips

    • Make sure the play area is free of tripping hazards and well bounded.
    • Supervise children closely, especially near roads or uneven ground.
    • Use torches with child-safe bulbs and batteries.
    • Encourage walking rather than running in the dark.

    Why it’s great

    This activity combines the excitement of a night-time adventure with problem-solving and teamwork. It’s a fun way for kids to explore the dark safely, build confidence, and share a memorable seasonal experience with their family—perfect for Halloween or any autumn evening.

  • Interview a Family Member

    Interview a Family Member

    This friendly interview activity helps children connect with a relative and capture family stories. It’s quick to set up, encourages listening and confidence, and creates a keepsake to look back on together.


    Materials

    • Notebook or a few sheets of paper
    • Pencil or pen
    • Optional: family photo album for prompts

    Tools

    • Phone or tablet with a voice recorder (optional)
    • Timer or clock (optional)

    Steps

    1. Choose a family member to interview (in person, by phone, or on a video call) and agree on a short time window.
    2. Help the child brainstorm 5–10 simple questions and write them down. Examples: “What games did you love as a kid?”, “What was your favourite place to visit?”, “Who taught you something important?”, “What makes you laugh?”
    3. Set up a comfy, quiet spot. Start the timer if using one. Press record if you’re capturing audio (optional).
    4. Begin with a warm-up (“Please say your name and how we’re related”), then ask the first question clearly and wait for the full answer.
    5. Encourage follow-ups like “Why?”, “How did that feel?”, or “Can you tell me more about that?” Write a couple of key words or make a quick sketch as notes.
    6. If energy dips, swap roles for one question so the adult asks the child something fun (“What’s your favourite thing to play right now?”).
    7. Finish by saying thank you. If appropriate, take a small photo together or draw a quick portrait to stick next to the notes.
    8. Turn the notes into a keepsake: a one-page “Family News” report, a decorated interview card, or a short audio clip to share with the family.

    Variations

    • Three-Question Mini Chat: Keep it super short with just three favourite questions.
    • Photo Prompt Interview: Pick a photo from an album and ask questions about the people and place in the picture.
    • Call a Relative: Do the interview by phone or video with a grandparent, aunt, or cousin who lives far away.
    • Role Reversal: Let the family member interview the child for one or two questions.
    • Story Recorder: Record audio (with permission) and add a simple title like “Grandad’s School Days”.
    • Recipe Memories: Ask about a favourite family food and note down any tips or stories linked to it.
    • Object Stories: Choose a meaningful object at home (a medal, toy, or souvenir) and build questions around it.

    Why It’s Great

    • Listening skills – Practises focusing on another person’s words and ideas.
    • Confidence – Builds speaking, turn-taking, and polite conversation habits.
    • Family connection – Captures memories and strengthens relationships across generations.
    • Literacy – Encourages planning questions, note-taking, and summarising.
    • Easy keepsakes – Creates a simple page or audio clip to treasure and share.

    Safety Tips

    • Ask permission before recording anyone. Delete or keep private if asked.
    • Avoid sharing personal details (addresses, passwords, full names online) without an adult’s approval.
    • Keep the conversation kind and allow anyone to skip a question they don’t want to answer.

  • Morse Code Messaging

    Morse Code Messaging

    Learn and play with Morse code—simple dots and dashes that turn light or sound into secret messages.

    It’s calm, screen-free fun that supports spelling, listening, and teamwork between parents, carers, and kids.


    Materials

    • Torch (cover with red cellophane and an elastic band if using in a dark room, optional)
    • Paper or card to make a small Morse code key (A–Z, 0–9)
    • Pencil and marker
    • Masking tape
    • Kitchen timer or stopwatch (optional)
    • Small buzzer with battery and wires (optional, adult help)
    • Beads and elastic (optional, for code bracelets)

    Tools

    • Scissors (adult use or supervised)
    • Hole punch (optional, for hanging the code key)

    Steps

    View the Morse Code here: https://www.history.navy.mil/content/dam/museums/undersea/education/Morse%20Code.pdf

    1. Make a code key: Draw a simple card with dots (short) and dashes (long) for a few letters to start (E = ·, T = —, S = ···, O = ———, A = ·—, N = —·). Add more as confidence grows.
    2. Pick your signal: Choose light (torch on/off) or sound (gentle taps on the table). Decide who sends first.
    3. Learn the rhythm: A dot is one beat; a dash is three beats. Pause one beat between parts of a letter, three beats between letters, and seven beats between words. Keep it relaxed.
    4. Practise SOS: Try the famous signal SOS = ··· ——— ···. Swap roles.
    5. Send a name: Encode a first name or favourite snack. The receiver writes down each letter as it’s decoded.
    6. Secret sentence: The sender chooses a short sentence (e.g., “Tea time”). Use the timer to see how long it takes—then try to beat it.
    7. Mini missions: Hide a note in the next room; send its location in Morse. Or play “Code & Seek”—the hider taps/flash-codes a single clue word.

    Variations

    • Torch Talk: Sit across the room and use covered torches for low-glare signals.
    • Tap Telegraph: Use a wooden spoon and a saucepan base for clear, gentle taps (not too loud).
    • Code Bracelets: White bead = dot, long bead = dash, blue bead = letter gap. Make a bracelet that spells a secret word.
    • Treasure Trail: Place 3–4 clue cards around the home/garden; each clue is in Morse leading to a small prize.
    • History Link: Look up a real ship or explorer and send a short “radio” message they might have used.

    Why It’s Great

    • Listening & rhythm – Matching beats builds attention and timing.
    • Spelling confidence – Encoding and decoding reinforces letter patterns.
    • Teamwork – Clear turn-taking and patience make success feel shared.
    • Creative play – Secret missions and treasure trails spark imagination.
    • Real-world context – A gentle intro to how messages travelled before mobiles.

    Safety Tips

    • Avoid shining torches into eyes; use a red cover for comfort in darker spaces.
    • Keep tapping gentle and away from glass or polished furniture.
    • Supervise scissors, batteries, and any wiring; adults handle electrical parts.
    • Use short, tidy lengths of string to reduce trip and choke hazards; pack away after play.
    • Be considerate of neighbours—keep light signals and noise indoors or at reasonable times.

    Story Prompt Ideas

    • “Stranded on an island, the team must send one Morse message—what do they say?”
    • “A secret agent needs help—what three-word code will save the day?”
    • “A lighthouse keeper spots trouble—send a message to the harbour.”
    • “On the Moon base, the radio breaks—how will they communicate?”
    • “Treasure is hidden nearby—what coded clue points the way?”
    • “Two birds tap a rhythm on the roof—what are they trying to tell us?”
  • Knots

    Knots

    Learn a few classic knots with simple, visual challenges. It’s practical, great for fine motor skills, and a lovely way for parents and carers to coach calm, step-by-step problem-solving.


    Materials

    • Short lengths of soft rope or cord (30–60 cm)
    • Old shoelaces or ribbon
    • Metal ring or carabiner (optional)
    • Wooden dowel or smooth stick
    • Paper or card for simple “knot cards”
    • Masking tape
    • Marker pen

    Tools

    • Scissors (adult use or supervised)
    • Hole punch (optional, for cards)

    Steps

    1. Set up: Cut a few cords and tape the ends to stop fraying. Draw quick picture cards for 3–5 knots (e.g., overhand, reef/square, figure-eight, clove hitch, bowline).
    2. Warm-up loop: Show how to make a simple loop and pull the end through for an overhand knot. Let everyone practise slowly.

      Overhand knot instructions (animatedknots.com)
    3. Join two ropes: Use two colours to teach a reef (square) knot—right over left, then left over right. Tug both ends to check it sits neat and flat.

      Square knot instructions (animatedknots.com)
    4. Stronger stopper: Make a figure-eight knot as a tidier stopper. Compare how it looks and feels versus the overhand.

      Figure of eight knot instructions (animatedknots.com)
    5. Around a stick: Wrap the cord around the dowel for a clove hitch (wrap, cross, tuck). Try lifting the stick gently to test grip.

      Clove hitch knot instructions (animatedknots.com)
    6. Make a loop that won’t slip: Tie a bowline around the ring or a stable object. Use the classic story (“the rabbit comes out of the hole…”) if helpful.

      Bow line knot instructions (animatedknots.com)

    Variations

    • Shoelace Bootcamp: Practise bows on a spare trainer or cardboard “shoe”.
    • Fort Builders: Use clove hitches to secure blanket corners to chair legs (gently, no climbing).
    • Knot Sorting Game: Mix real knots and ask, “Which one joins? Which one stops?”
    • Nature Tie: On a walk, tie gentle loops to bundle sticks or make a leaf garland (no tight ties on living plants).
    • One-Hand Challenge: Older kids try tying an overhand or figure-eight with one hand.
    • Rescue the Teddy: Build a safe “hoist” with a bowline loop to lift a soft toy onto a chair.

    Why It’s Great

    • Fine motor strength – Twisting and pulling builds finger dexterity for everyday tasks.
    • Problem-solving – Following sequences encourages patience and focus.
    • Real-world skills – Useful for shoelaces, camping, crafts, and quick fixes at home.
    • Confidence boost – Small wins add up as knots “click” into place.
    • Together time – Calm, side-by-side coaching nurtures connection.

    Safety Tips

    ⚠️ Any activity with ropes or cords is a potential choke hazard! Be very careful doing this with younger children and follow the safety tips below.

    • Supervise closely with cords and keep lengths short (30–60 cm) for practice.
    • Never tie anything around a neck or body.
    • Avoid tying to moving parts or high places.
    • Use soft rope and clear floor space to reduce trip hazards.
    • Adults handle scissors and check knots used in play can be untied easily.
    • Disassemble knots after the activity.
  • DIY Jigsaw Puzzle

    DIY Jigsaw Puzzle

    Children can create their very own jigsaw puzzles using drawings, magazine pictures, or photos.

    It’s a creative craft activity with a problem-solving twist. Once complete, they get the added satisfaction of putting the puzzle together themselves.

    This is a great quiet-time activity that develops logic, fine motor skills and artistic expression all in one.


    Materials

    • Thick paper or card
    • Pencils, pens, or crayons
    • Optional: magazine cut-outs, printed photos, or glue

    Tools

    • Scissors (child-safe or with adult help)
    • Glue stick (if using magazine cut-outs or printed images)

    Steps

    1. Draw a picture on a piece of card, or glue a photo or magazine image onto it.
    2. Let any glue dry fully before cutting.
    3. Flip the card over and draw puzzle-shaped lines on the back.
    4. Carefully cut along the lines to create puzzle pieces.
    5. Mix up the pieces and try to put the puzzle back together!

    Variations

    • Number Puzzle: Add numbers or letters to each piece to practise sequences.
    • Group Puzzle: Everyone in the family makes one puzzle to swap and solve.
    • Nature Puzzle: Use a pressed leaf or flower photo as the puzzle image.

    Why It’s Great

    • Boosts Problem-Solving – Kids use logic and memory to solve what they made.
    • Creative & Personalised – They get to design their own puzzle theme.
    • Low-Cost Fun – Just card and scissors needed!

    Safety Tips

    • Supervise younger children while using scissors.
    • Use child-safe scissors with rounded edges where needed.
  • Magic Potion Mixing

    Magic Potion Mixing

    Mix up a little magic with this messy, sensory activity that lets children become potion-making wizards.

    Using safe household ingredients like bicarbonate of soda and vinegar, children can create bubbling brews that fizz and foam. Add glitter, coloured water, or flower petals to make potions look as magical as they feel.

    This activity invites storytelling and creativity as children name their potions and imagine what powers they might hold!


    Materials

    • Jars, plastic cups or bowls
    • Spoons, pipettes or small jugs
    • Bicarbonate of soda (baking soda)
    • Vinegar or lemon juice
    • Food colouring
    • Optional: glitter, flower petals, herbs, sequins

    Tools

    • Tray or table covering (for easy clean-up)
    • Spoons or scoops

    Steps

    1. Set up a tray or work area with jars or cups and mixing tools.
    2. Add a spoonful of bicarbonate of soda to each container.
    3. Add drops of food colouring, glitter or other potion “ingredients”.
    4. Pour vinegar or lemon juice on top and watch it fizz!
    5. Give each potion a name — “Sleepy Dust”, “Dragon Breath” or “Invisible Ink” are great starters.

    Variations

    • Colour Mixing: Try mixing colours to see what new shades emerge in the potion.
    • No-Fizz Version: Just mix water, glitter, and ingredients for a calming swirl jar.
    • Outdoor Brews: Use mud, grass, or petals for earthy woodland potions.

    Why It’s Great

    • Encourages Imagination – Kids create stories and names for their potions.
    • Explores Cause and Effect – Fizzing reactions introduce science in a fun way.
    • Sensory Fun – Colours, textures, and sounds make it engaging for all senses.

    Safety Tips

    • Always supervise young children, especially when handling vinegar or glitter.
    • Ensure children understand potions are not edible.
    • Use a washable tray or surface and keep towels nearby for quick clean-ups.
  • Sand Mummy Wrap

    Sand Mummy Wrap

    Sand Mummy Wrap is a fun and creative way to turn someone into something silly — all with just a bit of sand!

    Children take turns lying down on the beach while others gently bury their arms or legs (never the head or face) and sculpt something around them, like a mermaid tail, rocket boosters, or monster claws.

    It’s all about using imagination, working together, and creating a silly surprise in the sand. Just remember to keep safety in mind and avoid full body coverage.


    Materials

    • Just sand and a bit of imagination!

    Tools

    • Hands (or small spades if already to hand)

    Steps

    1. Have one child lie down on soft, damp sand — arms by their sides or legs outstretched.
    2. Gently bury just their arms or legs with sand, making sure they’re comfortable and never covering the head or chest.
    3. Sculpt fun shapes around the buried area — a mermaid tail, octopus legs, robot arms — whatever comes to mind!
    4. Take a photo of the final creation before helping them brush off the sand.
    5. Switch roles and do it all again with someone new.

    Variations

    • Theme Challenge: Choose a category like “sea creatures” or “superheroes”.
    • Timed Build: Give yourselves 5 minutes to complete a funny sculpture.
    • Story Starter: Turn the creation into a character and invent a short story about it together.

    Why It’s Great

    • Encourages Creativity – Kids can turn a person into anything with a bit of sand and imagination.
    • Collaborative Play – A fun way for siblings or friends to take turns and work together.
    • Sensory & Relaxing – Many children enjoy the feeling of sand being gently piled around them.

    Safety Tips

    • Never bury the head, chest, or full body in sand — stick to arms or legs only.
    • Always make sure the child being sculpted is happy, comfortable, and not getting too hot.
    • Keep water and shade nearby to prevent overheating.
  • Make a DIY Compass

    Make a DIY Compass

    Making a DIY compass is a fun and simple way for children to learn about magnetism, Earth’s magnetic field, and basic navigation.

    With just a few household items, children can build their own working compass and watch how a magnetised needle naturally aligns to point north.

    This activity combines science, curiosity and problem-solving — perfect for little explorers or anyone interested in how things work. It’s also a great hands-on project to pair with map reading, treasure hunts or nature walks.


    Materials

    • A sewing needle or straight pin
    • A magnet (a fridge magnet will work)
    • A small bowl of water
    • A leaf or small piece of foam or cork
    • Tissue or kitchen paper (optional)

    Tools

    • No tools required — just a steady hand and some adult supervision

    Steps

    1. Stroke the magnet along the needle 10–20 times in the same direction. This magnetises the needle.
    2. Place the needle on top of a leaf or a small piece of foam/cork so it will float.
    3. Gently place it in the bowl of water. The needle will slowly turn and point north-south.
    4. Use a map or phone compass to verify which end is pointing north.

    Variations

    • Try Different Materials: Test whether other objects (e.g. paper clips) work when magnetised.
    • Pair With a Map Activity: Use your compass to navigate a simple indoor or outdoor route.
    • Learn About the Poles: Research why Earth has magnetic poles and how this affects animals like birds and turtles.

    Why It’s Great

    • Hands-On Science – A memorable way to explore physics and geography in action.
    • Problem Solving – Encourages questioning and testing how the natural world works.
    • Practical Skills – Introduces navigation and orientation in a fun, DIY format.

    Safety Tips

    • Supervise closely when using sharp needles or pins — consider using a blunt-ended alternative for younger children.
    • Keep magnets and sharp objects away from very young children and babies.
    • Use caution around water — small bowls only and stay close during the activity.
  • Join a Local Scouts or Guides Group

    Join a Local Scouts or Guides Group

    Joining a Scouts or Guides group is a brilliant way for children and teens to gain confidence, make friends, and learn practical life skills.

    These groups meet weekly in local halls or community spaces, often with opportunities for outdoor adventures, camping, creative crafts and team-building games.

    There are different sections based on age, with welcoming leaders and age-appropriate activities. Children work towards badges, explore nature, get involved in the community and try new challenges — from campfire cooking to map reading, creative arts to volunteering.


    Why It’s Great

    • Friendship & Belonging – Build strong bonds with peers in a supportive, inclusive environment.
    • Life Skills – Learn everything from knot tying to leadership and teamwork.
    • Adventure – Get stuck into outdoor fun like camping, hikes, and orienteering.
    • Creativity & Responsibility – Take part in arts, crafts, community projects, and practical challenges.

    Group Types by Age

    Mixed (boys & girls)

    • Beavers (6–8) – A fun introduction to Scouts with crafts, teamwork and nature walks.
    • Cubs (8–10½) – A step up in Scouts with more outdoor skills, camping, and challenges.
    • Scouts (10½–14) – Outdoor exploration, skill-building and exciting group adventures.
    • Rangers & Explorers (14–18) – More independence and chances for big projects, expeditions, and volunteering.

    Girls only

    • Rainbows (5–7) – Guiding for girls starting their journey through games and stories.
    • Brownies (7–10) – Guiding for girls with more independence and adventurous activities.
    • Guides (10–14) – Girls explore leadership, life skills and make a difference in their community.

    How to Get Started

    • Visit scouts.org.uk or girlguiding.org.uk.
    • Use their group finder tool to locate a local unit accepting new members.
    • Contact the group leader to arrange a trial session or waiting list spot.
    • Uniforms are often introduced after a few sessions — financial assistance is available if needed.

    Safety Tips

    • All leaders are DBS-checked and trained in safeguarding and first aid.
    • Children can attend trial sessions to see if it’s a good fit before committing.
    • Parents and carers are often encouraged to volunteer or assist where possible — it’s a great way to get involved too!
  • Threading with Pasta

    Threading with Pasta

    Threading with pasta is an easy and calming activity that helps little hands practise fine motor control while encouraging early creativity.

    Using just dry pasta and string, children can make simple jewellery or fun shapes, all while improving their hand–eye coordination and focus.

    This activity is great for toddlers and preschoolers, and it can be extended for older children by adding patterns, painted designs, or even themed creations (like pasta rainbows or garlands).


    Materials Needed

    • Uncooked pasta with holes (penne, rigatoni, macaroni, etc.)
    • String, ribbon or yarn (tape one end to make it easier to thread)
    • Optional: food colouring, paint or markers to decorate pasta

    Tools Needed

    • Scissors (for adults to cut string)
    • Paper towel or tray (if decorating pasta)

    Steps

    1. Set Up Your Station
      Place the pasta in a bowl or tray and cut pieces of string to the desired length for necklaces or bracelets.
    2. Decorate (Optional)
      If you want to add colour, paint the pasta in advance and let it dry completely before threading.
    3. Start Threading
      Tape one end of the string to the table or wrap a small piece of tape around it to create a ‘needle’. Then encourage your child to thread the pasta through one by one.
    4. Create and Celebrate
      Once they’ve filled the string, tie the ends to make a wearable item or hang it up as decoration.

    Variations

    • Colour Patterns: Use coloured pasta to practise making repeating patterns or counting games.
    • Shape Sorting: Mix pasta shapes and ask your child to sort or thread specific kinds.
    • Themed Designs: Make garlands for birthdays, holidays, or just because.

    Safety Tips

    • Always supervise toddlers when using small items like pasta to avoid choking risks.
    • Use non-toxic materials if decorating the pasta.
    • Choose short strings or ribbons for younger children to minimise tangling or wrapping risks.
  • Junior ParkRun

    Junior ParkRun

    Junior ParkRun is a free, fun, timed 2km run designed especially for children aged 4 to 14.

    It takes place in parks all over the UK (and in Ireland and Australia), usually on Sunday mornings, and is led by friendly volunteers in a welcoming, non-competitive atmosphere.

    Children can walk, jog, run or skip their way around the course — it’s all about participation and enjoyment. With music, cheering marshals and a growing community of families, it’s a lovely way to support fitness, confidence and independence from an early age.


    Materials Needed

    • Comfortable trainers and weather-appropriate clothing
    • Water bottle
    • Barcode (registration required at parkrun.org.uk/register)

    Tools Needed

    • None

    Steps

    1. Register Online
      Sign up your child at parkrun.org.uk and print their personal barcode — this helps track results and celebrate milestones.
    2. Find a Local Event
      Check the Junior ParkRun map for events near you and their start times (usually Sunday mornings).
    3. Arrive Early
      Give yourselves time to find parking, walk to the start and join in the fun warm-up.
    4. Join the Run
      Children can run with or without an adult — carers can run alongside or cheer from the sidelines depending on the child’s confidence.
    5. Celebrate the Finish
      Each child gets a time and a cheerful high-five at the finish line. Over time, children can earn milestone wristbands too.

    Variations

    • ParkRun Practice: Try doing your own fun runs at home or in the park to build excitement.
    • Fancy Dress: Some events have themed days — check the event page to see if costumes are welcome!
    • Volunteer Together: Older kids or carers can help out — it’s a great way to model community involvement.

    Safety Tips

    • Choose suitable clothing for the weather and make sure shoes are supportive and comfortable.
    • Bring water and snacks for after the run.
    • Stay nearby and supervise if your child is nervous or new to group events.
    • Make sure your child knows where the start and finish areas are.
  • Paper Tearing Collage

    Paper Tearing Collage

    Paper Tearing Collage is a wonderfully simple craft that helps develop fine motor skills and creativity. Children get to enjoy the satisfying act of tearing colourful paper into pieces, then sticking them down to create their own picture or abstract design.

    This hands-on activity doesn’t require scissors, so it’s ideal for little ones who are still learning to control their fingers and hands. It also gives them space to express themselves freely through colour and texture.


    Materials Needed

    • Coloured paper (scrap paper, old magazines or wrapping paper work too)
    • Glue stick or child-safe liquid glue
    • Large sheet of paper or card for the base

    Tools Needed

    • None (optional: glue spreader or brush)

    Steps

    1. Gather Materials
      Set out different coloured or textured paper, glue, and a blank sheet to stick pieces onto.
    2. Start Tearing
      Encourage your child to tear the paper into small or big pieces — whatever they like!
    3. Create a Design
      Let them glue the torn pieces onto the base paper in a shape, pattern, or random collage.
    4. Talk as You Go
      Chat about the colours, textures, or what their picture might represent to encourage language development.
    5. Display Their Work
      Once dry, hang up the finished collage somewhere special.

    Variations

    • Theme It: Try seasonal collages (e.g. autumn leaves, spring flowers) or a simple landscape like a rainbow or beach.
    • Add Texture: Mix in fabric scraps, foil, or tissue paper for added sensory interest.
    • Sticker Add-Ons: Use stickers or cut-out shapes to add characters or labels to their creation.

    Safety Tips

    • Use child-safe glue and ensure little ones don’t try to eat the paper or materials.
    • Supervise closely, especially with younger toddlers.
  • Teddy Bear’s Picnic

    Teddy Bear’s Picnic

    A Teddy Bear’s Picnic is a charming, imaginative activity that invites children to bring their soft toys together for a make-believe feast.

    Whether held in the garden or laid out on the living room floor, it offers a chance for pretend play, storytelling, and social interaction — all without needing to leave home.

    This kind of activity encourages creativity, language development, and empathy, as children assign personalities to their toys and host them like special guests. It’s also a lovely way to wind down or gently transition between more energetic games.


    Materials Needed

    • A few teddy bears or soft toys
    • Blanket or picnic mat
    • Pretend play food or real snacks (optional)
    • Plastic or toy crockery and utensils
    • Books or songs for a gentle picnic vibe

    Tools Needed

    • None

    Steps

    1. Set the Scene
      Lay down a blanket either outside or indoors and invite your child to bring their favourite soft toys to join the picnic.
    2. Add the Food
      Use pretend food or safe real snacks in small containers or plates.
    3. Serve and Play
      Encourage your child to pour drinks, share out food, and chat with their teddy guests.
    4. Make It Musical
      Sing “Teddy Bears’ Picnic” or play soft music while you enjoy the meal together.
    5. Wind Down with a Story
      Finish the picnic with a book read aloud to the toys, or some quiet snuggle time on the blanket.

    Variations

    • Dress-Up Teddies: Help your child dress their teddies in clothes or accessories before the picnic begins.
    • Guest List: Include dolls, action figures or animal toys and let your child create personalities and stories for each one.
    • Rainy Day Version: Host the picnic indoors under a play tent, table fort or canopy of blankets.
    • Themed Picnic: Create a tea party, birthday celebration or even a camp-out for the toys.

    Safety Tips

    • Supervise closely if using small pretend food or crockery with very young children.
    • Ensure food and drink are age-appropriate if serving real snacks.
    • Use a soft, flat surface for sitting to avoid slips or bumps.
  • Join a Local Music Group

    Join a Local Music Group

    Joining a music group helps children grow their musical abilities while experiencing the joy of playing together.

    Whether it’s a beginner string ensemble, youth orchestra, drumming circle, or brass band, local music groups are a brilliant next step for young instrumentalists.

    Sessions usually involve warm-ups, learning pieces together, and sometimes working towards performances or community events. Children develop musicality, discipline and teamwork — all while having fun with others who share their interests.


    Why It’s Great

    • Musical Growth – Reinforces rhythm, timing, and listening skills through real-world practice.
    • Teamwork & Collaboration – Teaches how to follow a conductor, blend with others, and support a shared goal.
    • Confidence & Belonging – Builds self-esteem and pride through participation and progress.
    • Inspiration & Joy – Being part of a group performance can be exciting and deeply rewarding.

    How to Get Started

    • Ask at your child’s school, local music hub, or community centre about beginner-friendly music groups.
    • Groups often welcome children with a few months of experience on an instrument — even basic knowledge is enough.
    • Look for inclusive groups that offer a gentle pace and plenty of encouragement.
    • Check whether instruments are needed or available to borrow for rehearsals.

    Variations

    • School-Based Groups: Many schools run lunchtime or after-school ensembles and choirs.
    • Genre-Based Groups: Options may include jazz bands, folk groups, rock bands, or percussion circles.
    • Holiday Clubs: Some music hubs run short-term holiday programmes for children to try playing in a group.

    Safety Tips

    • Ensure group leaders are DBS-checked and the space is safe and age-appropriate.
    • Children should never feel pressured to perform or compete — joy and progress are what matter most.
    • Encourage regular breaks and posture-friendly instrument use to prevent fatigue or discomfort.
  • Tray Memory Game

    Tray Memory Game

    The Tray Memory Game is a brilliant way to challenge children’s visual memory and attention skills in a playful, low-pressure way.

    It’s easy to set up, uses items you already have at home, and can be adapted for different ages or group sizes. Whether you’re playing solo, in pairs, or as a family, it always sparks curiosity and a bit of friendly competition.

    This activity is especially great for building focus and encouraging children to practise recall in a fun, no-stress setting.


    Materials Needed

    • A tray or flat surface
    • 15–20 small household items (try to include a mix of colours, textures, and types)
    • Paper and pens or pencils (optional, for writing guesses)

    Tools Needed

    • Optional: timer or phone stopwatch

    Steps

    1. Set Up the Tray
      Place 15–20 different small items on a tray. Try to include variety — e.g. spoon, toy car, coin, rubber, key, button, pebble, LEGO brick.
    2. Observation Time
      Let players study the tray for 3–5 minutes (or as long as you like). Use a timer if helpful — or keep it relaxed with no time limit.
    3. Hide the Tray
      Cover or remove the tray so no one can peek.
    4. Recall the Items
      Ask players to say or write down as many items as they can remember. You can also take turns naming one item at a time.
    5. Reveal and Check
      Bring the tray back and check how many were remembered. Celebrate the effort, not just the score!

    Variations

    • Themed Trays: Try themes like nature, kitchen items, or toys for added interest.
    • Missing Item: After showing the tray, secretly remove one object and ask players to spot what’s missing.
    • Pair Play: Play in teams and combine your memory power.
    • Speed Round: Use just 10 items but give only 30 seconds to look!
  • Rockpooling

    Rockpooling

    Rockpooling is a magical way for children to discover the fascinating marine world up close.

    As the tide goes out, small pools of seawater are left behind in rocky areas, offering the chance to spot tiny crabs, limpets, sea anemones, fish, starfish and other coastal creatures.

    All you need is curiosity (and maybe a bucket or magnifying glass), and a willingness to tread gently as you explore. It’s a great way to encourage appreciation for nature, introduce marine science, and enjoy slow, mindful discovery time by the sea.


    Materials

    • Small bucket or container (optional)
    • Net (optional, use gently and sparingly)
    • Magnifying glass
    • Wellies or beach shoes
    • Waterproofs or layers, depending on weather

    Tools

    • None

    Steps

    1. Visit a beach with rocky areas and known rockpools — check tide times and aim for low tide.
    2. Walk slowly and carefully, looking into the pools without disturbing the creatures.
    3. Use a magnifying glass to get a closer look at small animals, shells and algae.
    4. If using a net or bucket, always return animals to where they came from gently and promptly.
    5. Chat about what you find — try identifying creatures or simply enjoy observing them.

    Variations

    • Creature Count: How many different animals or colours can be spotted?
    • Sketch It: Bring a notebook to draw some of your favourite finds.
    • Mini Marine Journal: Keep a log of different rockpool creatures you see on different beach visits.

    Why It’s Great

    • Builds Respect for Nature – Encourages gentle interaction and care for living things.
    • Sparks Curiosity – Inspires questions and early science exploration.
    • Mindful Outdoor Play – Combines movement with focused observation and calm exploration.

    Safety Tips

    • Always supervise near water and rocks — surfaces may be slippery.
    • Check tide times and avoid getting caught as the water comes in.
    • Handle sea creatures gently, and return them quickly to their original spot.
    • Wash hands after exploring, especially before eating.
  • Join a Forest School Group

    Join a Forest School Group

    Forest school is a child-led, outdoor learning experience that focuses on exploration, resilience and connection with the natural world.

    Sessions are usually held in woodlands or green spaces and involve everything from den building and bug hunting to tool use and campfire cooking — all guided by trained forest school leaders.

    Children are encouraged to take healthy risks, work together, and learn through play. The relaxed, non-pressured environment is especially supportive for building self-esteem, emotional regulation and social skills.


    Why It’s Great

    • Confidence & Independence – Children learn at their own pace while trying new things in a supportive setting.
    • Connection to Nature – Encourages curiosity, respect for wildlife, and seasonal awareness.
    • Resilience & Problem-Solving – Builds perseverance through practical, hands-on tasks.
    • Physical & Emotional Wellbeing – Regular time outdoors supports movement, mindfulness and self-regulation.

    How to Get Started

    • Search for forest school groups in your area — many are term-time sessions, weekend clubs, or holiday programmes.
    • Sessions are typically run by Level 3-trained Forest School Leaders with outdoor first aid certification.
    • Dress for the weather — waterproofs and layers are essential year-round.
    • Some sessions are drop-off; others welcome parents and carers to stay and take part.

    Variations

    • Preschool Forest Play: Shorter, play-led sessions for toddlers and early years.
    • Holiday Bushcraft Camps: Longer, adventure-based programmes for older children.
    • Family Forest School: Some groups offer weekend sessions where the whole family can join in.

    Safety Tips

    • Check that the forest school is fully insured and run by trained leaders with up-to-date first aid and safeguarding credentials.
    • Risk assessments should be in place for tools, fire and nature-based activities.
    • Ensure children are dressed appropriately for the weather and terrain — warmth and comfort go a long way!
  • Join a Drama Club

    Join a Drama Club

    Joining a drama club is a fun and creative way for children to explore storytelling, emotions and teamwork.

    Through games, improvisation, and performance, kids develop communication skills, self-confidence and empathy — all while having a great time with their peers.

    Sessions typically include warm-ups, acting games, character work, and short scenes. Some groups work towards shows or informal performances, while others focus more on play and imagination. There’s no pressure to perform — children are encouraged to join in at their own pace.


    Why It’s Great

    • Confidence & Self-Esteem – Encourages speaking in front of others and trying new things.
    • Creativity & Expression – Helps children explore different characters and emotions.
    • Teamwork – Builds trust and cooperation through group activities and scene work.
    • Fun & Friendship – A relaxed and playful environment for kids to connect and explore together.

    How to Get Started

    • Search online for local children’s drama clubs, youth theatres, or after-school stage groups.
    • Look for age-appropriate classes — many start from age 5 or 6, with beginner sessions available.
    • Some groups offer a free trial or open session so children can try it out first.
    • Comfy clothes and enthusiasm are all that’s needed — props and costumes are usually provided.

    Variations

    • Musical Theatre Groups: Combine drama with singing and dancing for high-energy sessions.
    • Improvisation Clubs: Focus on spontaneous storytelling, comedy and quick-thinking games.
    • Scripted vs. Play-Based: Some clubs focus on rehearsing a play; others explore free expression and drama games.

    Safety Tips

    • Choose a club with DBS-checked leaders and a safe, supportive ethos.
    • Ensure there’s no pressure to perform if your child prefers a quieter role — behind-the-scenes roles can be just as valuable.
    • Drama should be fun and inclusive — look for a setting where all children are celebrated for who they are.