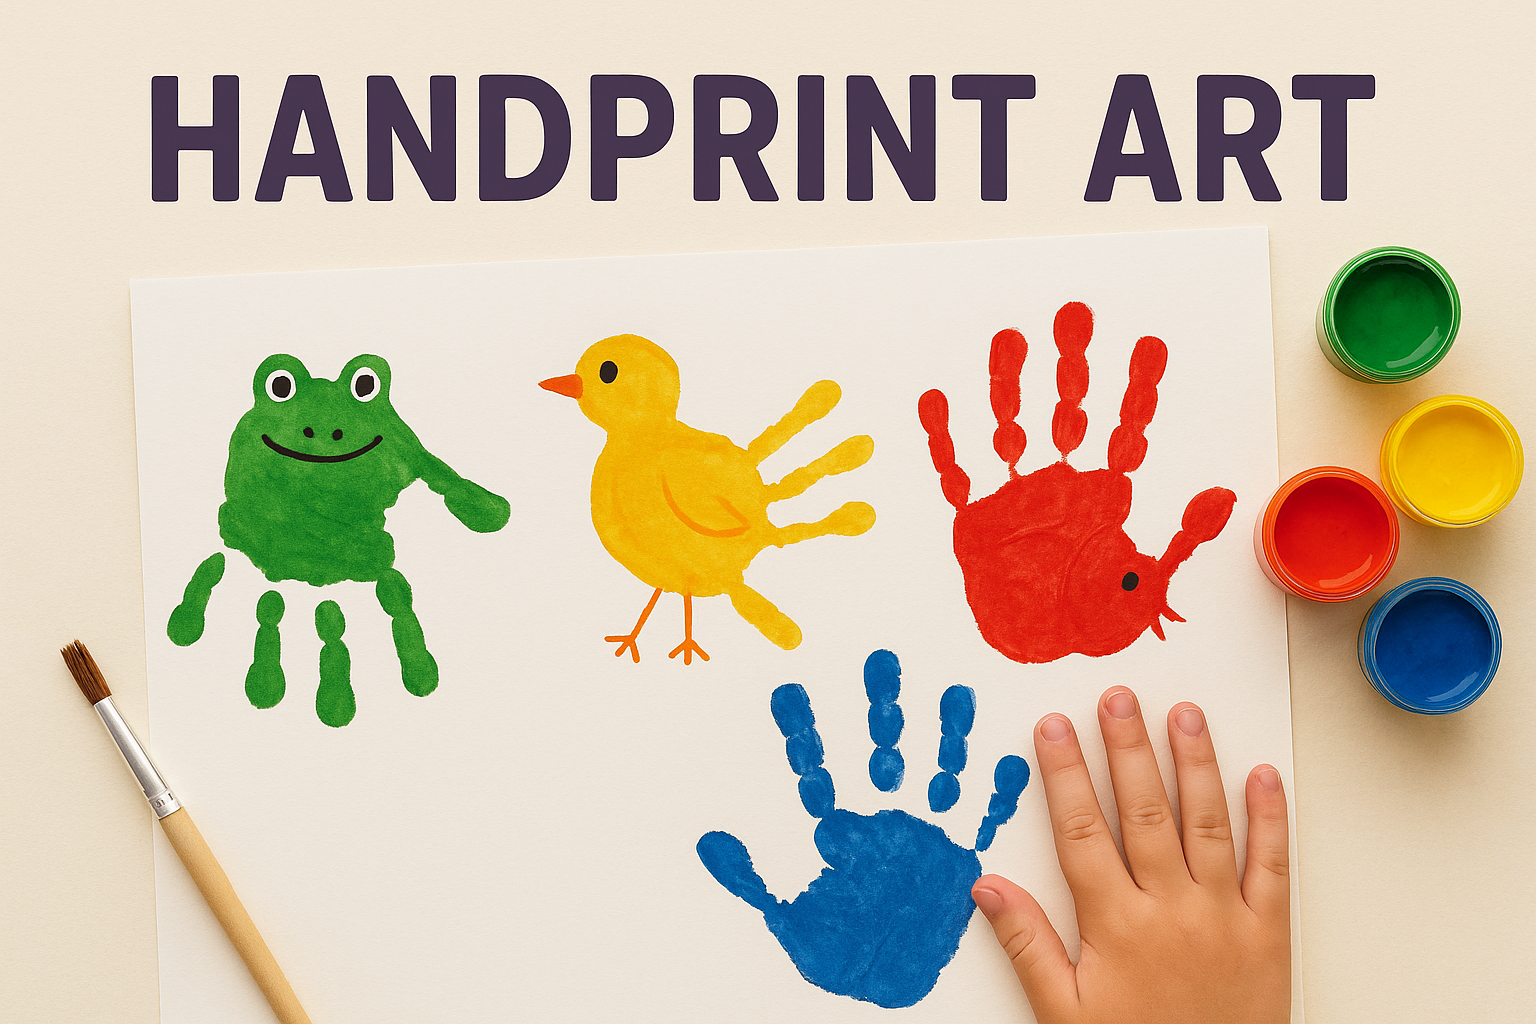
Parental Involvement: High

  • Beach Clean

    Beach Clean

    A beach clean is a brilliant way for children to learn about environmental responsibility while enjoying the great outdoors. By helping remove litter from the shore, kids contribute to protecting wildlife and keeping our natural spaces beautiful for everyone.

    This hands-on activity is a great mix of exercise, teamwork, and learning. It sparks conversations about ocean pollution, recycling, and the small actions we can all take to care for the planet.


    Materials Needed

    • Reusable gloves
    • Bin bags or compostable rubbish sacks
    • Hand sanitiser or wipes
    • Optional: litter picker or tongs, separate bag for recyclables

    Tools Needed

    • Litter picker or tongs (optional)

    Steps

    1. Pick a Spot
      Head to a local beach, shoreline, or coastal path that’s safe and accessible.
    2. Gear Up
      Put on gloves and explain the safety rules: no sharp or suspicious items, always check with an adult before picking something up.
    3. Start Collecting
      Work together to spot and collect litter. Focus on plastic wrappers, bottles, and food packaging.
    4. Sort It
      If possible, separate recyclables from general waste.
    5. Dispose Responsibly
      Use the nearest bins or take your rubbish home to dispose of it properly.

    Variations

    • Beach Bingo: Make a game out of it by spotting items from a beach clean checklist (e.g. bottle cap, crisp packet, seaweed).
    • Make It a Challenge: Set a timer or fill a bag and see how quickly you can clean a section of the beach.
    • Art from Rubbish: Use safe, clean finds to make a beach-themed collage or sculpture.
    • Join a Local Group: Team up with a community or charity beach clean event for a bigger impact.
  • Create Your Family Tree

    Create Your Family Tree

    Creating a family tree is a thoughtful and creative activity that encourages children to learn about their family history. It’s a chance to share stories, look at old photos, and help children understand how they fit into the bigger picture of their family.

    From a simple drawn tree to a colourful collage of names and photos, this activity can be tailored to different ages and interests. It also helps build a sense of identity and belonging—plus it makes a lovely keepsake.


    Materials Needed

    • Paper, card, or a printable family tree template
    • Coloured pencils or markers
    • Glue or tape
    • Optional: family photos, stickers, decorative paper

    Tools Needed

    • Scissors

    Steps

    1. Talk About Your Family
      Start by naming grandparents, parents, siblings, and other relatives your child knows.
    2. Draw the Tree
      Sketch a tree shape or use a pre-printed template. Add boxes or branches for each family member.
    3. Fill in Names
      Write names (and optionally ages or birthplaces) in each space. Use photos if available.
    4. Decorate
      Colour the tree and decorate it with stickers, leaves, or drawings that represent each person.
    5. Display or Share
      Hang the finished tree somewhere special or send a photo to family members.

    Variations

    • Photo Tree: Use real photos for each person instead of names.
    • Story Tree: Add fun facts or short stories about each family member.
    • Future Tree: Let kids imagine their future family and draw that too.
    • Digital Version: Create the tree using a simple app or online tool and print it out.
  • Visit a Pet Shop

    Visit a Pet Shop

    Taking a trip to your local pet shop can be a surprisingly delightful way to spend time with your child. From colourful fish to curious guinea pigs, and even exotic reptiles, a pet shop can be like a miniature zoo—without the admission fee.

    Children get the chance to see animals up close, ask questions, and learn how different pets are cared for. It’s a great way to nurture empathy and curiosity about animals, especially for families who may not have pets at home.


    Materials Needed

    • None (optional: small notebook or activity sheet)

    Tools Needed

    • None

    Steps

    1. Find a Pet Shop Nearby
      Look for one that stocks a variety of animals—fish, birds, small mammals, or reptiles.
    2. Plan a Calm Visit
      Visit during quieter times to avoid crowds and allow more time to explore.
    3. Observe the Animals
      Encourage your child to quietly watch the animals—what are they doing? How do they move?
    4. Ask Questions
      Chat with the staff (if appropriate) or guess what each animal might need to stay healthy and happy.
    5. Talk Afterwards
      Discuss your favourite animals and whether any might make a good pet in future.

    Variations

    • Animal Spotting Sheet: Make a checklist of animals to find, or draw what you see.
    • Pet Detective Game: Give clues like “Find an animal with long ears” or “something that swims”.
    • Follow-Up Activity: Create a pet care poster at home or write about the visit.
    • Visit an Aquarium Shop: Shops that specialise in fish often have stunning tanks to admire.
  • Elderflower Fritters

    Elderflower Fritters

    Elderflower fritters are a lovely and unexpected way to use freshly picked elderflowers.

    This activity blends outdoor foraging with indoor cooking, as children collect the frothy blossoms and help dip them in batter to fry into light, crispy snacks.

    It’s a brilliant way to introduce seasonal awareness and plant identification, as well as offering fun, hands-on kitchen experience. These fritters are best served warm with a sprinkle of sugar or a drizzle of honey — perfect for a special weekend treat.


    Materials Needed

    • 8–10 elderflower heads (freshly picked and clean)
    • 100g plain flour
    • 1 egg
    • 150ml sparkling water (or still water)
    • Vegetable oil for frying
    • Icing sugar or honey to serve (optional)

    Tools Needed

    • Mixing bowl and whisk
    • Frying pan or deep saucepan
    • Slotted spoon
    • Kitchen paper
    • Tongs (optional)

    Steps

    1. Pick Your Flowers
      Head out to collect fresh elderflower heads, ideally in the morning when the aroma is strongest. Avoid flowers near roads or sprayed areas.
    2. Make the Batter
      In a bowl, mix the flour, egg and sparkling water to make a light, smooth batter. Let it rest for 10 minutes.
    3. Heat the Oil
      Heat vegetable oil in a deep pan over medium heat (test with a small drop of batter — it should sizzle).
    4. Dip and Fry
      Hold each elderflower by the stalk, dip it in the batter, then lower carefully into the oil. Fry until golden and crisp (about 1 minute each side).
    5. Drain and Serve
      Place on kitchen paper to drain. Dust with icing sugar or drizzle with honey if desired.

    Variations

    • Sweet or Savoury: Add a pinch of cinnamon for sweet fritters, or a sprinkle of salt and herbs for a savoury twist.
    • Try With Other Edibles: Batter and fry courgette flowers or sage leaves if elderflower is out of season.
    • Mini Dippers: Snip larger heads into smaller sprigs for bite-sized versions.

    Check out our Elderflower Cordial activity!


    Safety Tips

    • Supervise all cooking closely, especially when using hot oil. This step is for adults only.
    • Check elderflowers are correctly identified before using — they should smell sweet and floral, not musty or sharp.
    • Use caution when foraging — only collect from safe, chemical-free areas.
  • Breakfast in Bed

    Breakfast in Bed

    Making and serving breakfast in bed is a lovely way for children to practise kindness and learn some basic kitchen independence.

    Whether it’s a surprise for a parent, sibling, or even a cuddly toy, the joy is in the giving—and the giggles along the way!

    Kids can help plan the menu, prepare simple foods, and set everything up on a tray with little extras like a flower in a jar or a handmade note.

    It’s a brilliant mix of creativity, responsibility, and fun—and a memory that will last long after the crumbs are gone.


    Materials Needed

    • Breakfast foods (e.g. toast, cereal, fruit, yoghurt, or croissants)
    • Tray or large plate
    • Napkin or small cloth
    • Optional: flowers, handmade card, or small decoration

    Tools Needed

    • Butter knife, spoon, bowls or cups
    • Toaster or kettle (with adult supervision)

    Steps

    1. Plan the Menu
      Keep it simple and safe—things like fruit, toast, or cereal are perfect for kids to prepare.
    2. Prepare the Tray
      Lay out a tray or large plate and add a napkin to keep things tidy.
    3. Add Personal Touches
      Include a flower in a cup, a sweet note, or a little drawing.
    4. Deliver with a Smile
      Carefully carry the tray and present breakfast in bed like a true room service star!
    5. Help Clean Up
      Finish the activity by tidying up together—just as important as the serving.

    Variations

    • Play Café: Turn the kitchen into a café with a menu and a pretend till.
    • Teddy Breakfast: Serve breakfast in bed to a teddy or doll for younger children.
    • Make a Menu: Let kids design and decorate a breakfast menu ahead of time.
    • Holiday Twist: Try themed breakfasts (e.g. heart-shaped toast on Valentine’s Day).
    Birthday breakfast in bed menu
    My daughter made a menu for my birthday breakfast in bed. 🥰
  • Build a Bug Hotel

    Build a Bug Hotel

    Building a bug hotel is a fantastic way for children to connect with the natural world while supporting local wildlife. By stacking natural materials into sheltered spaces, you can create a cosy habitat for beetles, woodlice, spiders, ladybirds, and even solitary bees.

    This project teaches kids about biodiversity, habitats, and seasonal change. It also offers plenty of opportunity for hands-on building, creativity, and observation—especially when your hotel starts to get its first tiny guests!


    Materials Needed

    • Wooden box, crate, or stack of bricks/wooden pallets
    • Dry leaves, pinecones, straw, hollow sticks or bamboo canes
    • Twigs, bark, stones, broken terracotta pots
    • Optional: chicken wire or mesh (to hold materials in place)

    Tools Needed

    • Secateurs or small saw (for trimming sticks – adult use only)
    • Gloves (optional, for handling rough materials)

    Steps

    1. Choose a Spot
      Pick a shady, quiet corner in the garden where bugs will feel safe and undisturbed.
    2. Create a Structure
      Use a wooden box, crate, or stack materials like pallets or bricks to build the hotel base.
    3. Fill with Natural Materials
      Layer twigs, leaves, pinecones, and other items inside the compartments or gaps.
    4. Add Finishing Touches
      Use mesh to keep materials in place if needed. Label your bug hotel with a sign if you like!
    5. Observe and Learn
      Keep checking back to see what insects have moved in—different bugs may visit throughout the seasons.

    Variations

    • Mini Bug Hotel: Use an old tin can filled with twigs and bamboo for a smaller version that can hang on a fence.
    • Bee Zone: Create a section just for solitary bees using bundles of hollow stems or drilled wood blocks.
    • Decorate It: Paint or label your hotel with the kids’ names or “Bug B&B” signs.
    • Bug Spotting Journal: Keep a log of the different creatures you see over time.
  • Have a Picnic

    Have a Picnic

    Having a picnic is one of the easiest and most joyful ways to enjoy the outdoors as a family. Whether it’s in your back garden, a local park, or even indoors on a rainy day, it turns an ordinary meal into something special.

    Children can help plan the menu, pack the basket, and set up the blanket. Add a few simple games, books, or a nature scavenger hunt, and you’ve got an experience full of connection, laughter, and fresh air.


    Materials Needed

    • Picnic blanket or large towel
    • Easy-to-eat food (e.g. sandwiches, fruit, crisps, biscuits)
    • Drinks
    • Wipes or napkins
    • Optional: basket or bag, plastic containers, cutlery

    Tools Needed

    • None

    Steps

    1. Plan the Menu
      Let kids help choose simple, transportable food items.
    2. Pack the Basket
      Use reusable containers and drinks bottles. Don’t forget napkins or wipes.
    3. Pick Your Spot
      Find a flat, shady space if possible—garden, park, or indoor option if needed.
    4. Set Up and Eat
      Lay out your blanket and enjoy your meal together.
    5. Add Extras
      Bring a book, a ball, or a few games for after-lunch fun.

    Variations

    • Indoor Picnic: Set up on the living room floor during cold or rainy weather.
    • Teddy Bears’ Picnic: Invite soft toys along for younger children.
    • Themed Picnic: Try a colour-based meal (e.g. “green picnic”) or a breakfast picnic.
    • Nature Activities: Combine with bird-watching, cloud-spotting, or a nature walk.
  • Rice Krispie Squares

    Rice Krispie Squares

    Rice Krispie Squares are a childhood favourite and a brilliant first recipe for young helpers in the kitchen. With just three basic ingredients—marshmallows, butter, and Rice Krispies—you can make a tray of chewy, crunchy squares that are perfect for snacks, parties, or gifting.

    This no-bake recipe is great for introducing kids to cooking. It encourages measuring, mixing, and working safely in the kitchen with a grown-up nearby. You can keep it classic or jazz it up with chocolate, sprinkles, or fun shapes.


    Materials Needed

    • 3 tbsp butter

    • 200g marshmallows

    • 150g Rice Krispies cereal

    • Optional: chocolate chips, sprinkles, food colouring, sweets


    Tools Needed

    • Large saucepan

    • Wooden spoon

    • Large mixing bowl

    • Square or rectangular tray (lined with greaseproof paper)

    • Optional: cookie cutters


    Steps

    1. Melt Butter and Marshmallows: In a large saucepan over low heat, melt the butter. Add the marshmallows and stir until completely melted and smooth.

    2. Mix in Cereal: Remove from heat and stir in the Rice Krispies until fully coated.

    3. Transfer to Tray: Press the mixture evenly into a lined tray using a spatula or lightly buttered hands.

    4. Cool and Set: Let the mixture cool at room temperature for at least 30 minutes.

    5. Cut and Serve: Slice into squares—or use cookie cutters to make fun shapes!


    Variations

    Chocolate Coating: Drizzle melted chocolate on top or mix chocolate chips into the mixture.

    Rainbow Treats: Stir in sprinkles or mini sweets before pressing into the tray.

    Shape It Up: Use cookie cutters to make hearts, stars, or animals.

    Flavour Twist: Add a drop of vanilla or peppermint extract for an extra boost.

  • Make-Your-Own Mini Pizzas

    Make-Your-Own Mini Pizzas

    Make-Your-Own Mini Pizzas is a brilliant cooking activity for kids that’s equal parts creative and delicious. Children choose their own toppings and build their own pizzas from scratch (or using ready-made bases). It’s perfect for developing independence, trying new ingredients, and learning kitchen skills in a fun, low-pressure way.

    This activity works well for lunch, dinner, or even a party set-up. Plus, it’s easy to adapt for dietary needs and fussy eaters—everyone gets exactly what they want!


    Materials Needed

    • Mini pizza bases, pitta bread, English muffins, or flatbreads

    • Tomato purée or pizza sauce

    • Grated cheese

    • Toppings: sliced peppers, sweetcorn, mushrooms, ham, pineapple, pepperoni, olives, cherry tomatoes, etc.


    Tools Needed

    • Baking tray

    • Spoon (for spreading sauce)

    • Knife (for cutting toppings – adult supervision required)

    • Oven or air fryer


    Steps

    1. Set Up the Toppings: Place toppings in small bowls for easy access and choice.

    2. Prepare the Base: Place pizza bases on a baking tray and preheat the oven.

    3. Spread the Sauce: Kids spread tomato sauce on their base using a spoon.

    4. Add Toppings: Let each child add their favourite toppings and sprinkle on cheese.

    5. Bake: Adult places pizzas in the oven and bakes according to base instructions (usually 8–12 minutes at 180°C/350°F).

    6. Cool and Eat: Allow to cool slightly before serving.


    Variations

    Face Pizzas: Use toppings to create silly faces or characters.

    Themed Toppings: Create colour-themed or seasonal pizzas (e.g. spooky Halloween faces, red-and-green for Christmas).

    Sweet Pizzas: Use flatbreads with chocolate spread, banana slices, and marshmallows for a dessert version.

    DIY Pizza Bar: Great for parties—set up a buffet of bases and toppings for self-serve fun.

  • Decorate biscuits

    Decorate biscuits

    Decorating Biscuits is a simple and sweet hands-on activity that’s perfect for all ages. Using shop-bought or homemade plain biscuits, children can get creative with icing, sprinkles, sweets, and more. It’s part art project, part snack—and all fun.

    This is a great rainy-day activity, party table idea, or festive treat. It supports fine motor skills, colour recognition, and lets kids explore patterns and shapes while enjoying a tasty reward at the end.


    Materials Needed

    • Plain biscuits (digestives, rich tea, or homemade)

    • Icing sugar or ready-made icing tubes

    • Food colouring (optional)

    • Sprinkles, sweets, chocolate chips, or dried fruit

    • Optional: edible pens or writing icing


    Tools Needed

    • Small bowls for toppings

    • Spoons or plastic knives

    • Clean surface or tray for decorating


    Steps

    1. Set Up a Decorating Station: Lay out biscuits, toppings, and tools on a clean surface or tray.

    2. Make the Icing: Mix icing sugar with a little water to make a thick, spreadable icing. Add food colouring if you like.

    3. Decorate!: Let kids ice their biscuits and decorate with sprinkles, sweets, or other toppings.

    4. Let Them Set: Leave the decorated biscuits to dry for 10–15 minutes before handling (if they can wait!).

    5. Eat or Gift: Enjoy the creations as a snack or package them up as a homemade gift.


    Variations

    Theme Biscuits: Try holiday themes like hearts for Valentine’s Day, trees for Christmas, or pumpkins for Halloween.

    Letter or Number Biscuits: Decorate biscuits with letters, numbers, or names—great for early literacy fun.

    Biscuit Faces: Use toppings to create silly or expressive faces.

    Blindfold Challenge: For older kids, decorate while blindfolded and see how they turn out!

  • Cereal Box Puppet Theatre

    Cereal Box Puppet Theatre

    Cereal Box Puppet Theatre is a brilliant way to reuse packaging and spark big-time imaginative play. With a little cutting and decorating, an ordinary cereal box becomes a charming puppet stage. Add in some paper finger puppets, and your child is ready to put on a full production!

    From fairy tales and animal stories to silly made-up plots, this activity helps children explore storytelling, character creation, and performance. It’s an engaging mix of craft and pretend play—ideal for kids who love drama, drawing, or just being centre stage.


    Materials Needed

    • Empty cereal box

    • Construction paper or coloured card

    • Scrap paper or white paper (for making puppets)

    • Glue and/or tape

    • Markers, crayons, or paints

    • Optional: stickers, fabric scraps, buttons


    Tools Needed

    • Scissors or craft knife (adult supervision required)

    • Pencil

    • Ruler (optional, for neat window edges)


    Steps

    1. Cut the Stage: Stand the cereal box upright. Cut a large rectangle out of one broad side to create the “stage” window.

    2. Decorate the Theatre: Cover the outside of the box with coloured paper or paint. Add curtains, stage lights, or signage!

    3. Make Puppets: Draw characters on paper, cut them out, and tape them to fingers or use loops of paper to slip them on.

    4. Rehearse and Perform: Create a simple story, assign characters, and put on a mini show!

    5. Store Inside: Use the cereal box to store your puppets when the show’s over.


    Variations

    Stick Puppets: Tape your characters to craft sticks or straws instead of using fingers.

    Themed Theatre: Design the stage and puppets around a favourite book, holiday, or fairy tale.

    Shadow Puppet Theatre: Cut out puppets from black card and use a torch behind the box to cast shadows.

    Double-Sided Stage: Cut windows in both sides of the box so the audience can watch from either direction.

  •  Handprint Art

     Handprint Art

    Handprint Art is a fun, tactile way for kids to express themselves while creating colourful keepsakes. Using their painted hands, children press prints onto canvas or paper and transform them into animals, flowers, trees, or festive scenes.

    This activity is especially great for seasonal crafts (like turkeys for Thanksgiving or reindeer at Christmas) or for simply celebrating your child’s creativity—and growth! Handprint art makes for wonderful wall displays, cards, or gifts for family and friends.


    Materials Needed

    • Canvas, cardstock, or heavy paper

    • Washable paint (various colors)

    • Paper plate or paint tray

    • Optional: googly eyes, glitter, pom-poms, or stickers for decoration


    Tools Needed

    • Paintbrushes or sponge (for applying paint to hands)

    • Damp cloth or wipes for cleanup


    Steps

    1. Prepare the Canvas: Lay out your canvas or paper and protect the surface underneath.

    2. Paint the Hand: Use a brush or sponge to apply paint to your child’s hand.

    3. Make the Print: Press the painted hand firmly onto the canvas, then lift straight off.

    4. Let It Dry: Allow the handprint to dry fully.

    5. Add Details: Turn the handprint into a picture—add eyes, stems, feet, or decorations using paint, markers, or craft supplies.


    Variations

    Animal Handprints: Turn prints into peacocks, elephants, fish, or dinosaurs.

    Seasonal Scenes: Make turkeys for Thanksgiving, Christmas trees, or summer suns.

    Family Hands: Layer handprints of different family members in different colors for a sweet keepsake.

    Card or Gift: Use small canvases or foldable cardstock to create handprint greeting cards.

  • Salt Dough Ornaments

    Salt Dough Ornaments are a timeless, hands-on craft that kids love. With just flour, salt, and water, you can whip up a simple dough that’s easy to shape into ornaments and decorations. Once baked and hardened, they become a blank canvas for painting, decorating, and personalizing.

    This activity is perfect for seasonal fun—make Christmas trees, Halloween pumpkins, Easter eggs, or even handprint keepsakes. It encourages creativity, sensory play, and fine motor skills, and the finished ornaments make wonderful gifts or mementos to treasure.


    Materials Needed

    • 2 cups all-purpose flour

    • 1 cup salt

    • 1 cup water

    • Paint (acrylic or poster paint)

    • Optional: ribbon, string, glitter, buttons for decorating


    Tools Needed

    • Mixing bowl and spoon

    • Rolling pin

    • Cookie cutters or plastic knives

    • Baking tray and oven

    • Paintbrushes

    • Straw or skewer (to poke holes for hanging)


    Steps

    1. Make the Dough: Mix flour and salt in a bowl. Gradually add water until it forms a smooth dough.

    2. Shape the Ornaments: Roll out the dough and use cookie cutters or shape by hand. Use a straw to poke a hole at the top for hanging.

    3. Bake: Bake in the oven at a low temperature (around 100–120°C / 210–250°F) for 1–2 hours or until dry and hard.

    4. Cool and Paint: Let ornaments cool completely before decorating with paint and extras like glitter or buttons.

    5. Add a Hanger: Thread ribbon or string through the hole once dry and display proudly!


    Variations

    Seasonal Themes: Create Christmas trees, snowflakes, pumpkins, hearts, or stars based on the season.

    Keepsake Prints: Press in handprints or footprints for memory ornaments.

    Scented Dough: Add cinnamon or essential oils to the dough for a festive scent.

    Air Dry Version: Skip baking and air-dry over 24–48 hours (though this may crack more easily).

  • Go for a hike

    Go for a hike

    Going for a hike is a wonderful way to combine exercise, exploration, and quality family time. Whether it’s a gentle walk through the woods or a more adventurous climb, hiking encourages kids to engage with the natural world—spotting wildlife, listening to birds, and observing plants along the way.

    You can make hikes even more exciting with mini scavenger hunts, nature checklists, or storytelling games as you walk. It’s a fantastic way to build stamina, boost mood, and create lasting outdoor memories. Start small with local trails and work your way up to bigger adventures!


    Materials Needed

    • Comfortable clothes and shoes

    • Water bottles

    • Snacks (often the only thing that gets my daughter to come along!)

    • Optional: small backpack, binoculars, nature guide, or magnifying glass


    Tools Needed

    • None


    Steps

    1. Pick a Trail: Choose a hike appropriate for your child’s age and stamina (flat trails for beginners, more varied terrain for older kids).

    2. Prepare Together: Pack essentials like water, snacks, sunscreen, and hats.

    3. Set Goals: Look for fun trail markers, spot certain animals, or see who can find the coolest tree.

    4. Take Your Time: Encourage kids to stop, look around, and enjoy the journey—not just the destination.

    5. Celebrate the Adventure: Finish with a mini picnic, a nature journal entry, or a photo to remember the day.

  • Times Table Dash

    Get ready to multiply the fun in this high-energy math adventure! In Times Table Dash, the room transforms into a math maze filled with mystery numbers on post-it notes. Everyone starts in the center, sitting in the “Math Zone.” The parent (a.k.a. the Quiz Master) calls out a times table question—like “7 x 6!”—and the race begins!

    One child at a time dashes off to hunt down the correct answer hidden somewhere around the room. Will they find 42 before the time runs out? Can they beat their personal best? Will they grab the right number or fall into a tricky trap?

    It’s part brain power, part scavenger hunt, and 100% fun!


    Materials Needed

    • Post-it notes or paper


    Tools Needed

    • None


    Steps

    1. Write answers to times tables (e.g., 12, 24, 36, etc.) on individual post-it notes. Make sure to include correct answers and a few random incorrect ones to make it challenging!
    2. Stick the post-it notes all around the room – on walls, furniture, or safe surfaces.
    3. All players sit in the centre of the room in a “Math Zone” circle.
    4. The Quiz Master calls out a multiplication question (e.g., “8 x 7!”).
    5. One child at a time jumps up and runs off to find the post-it with the correct answer (in this case, “56”).
    6. The player must bring the post-it note back to the Quiz Master as fast as they can.
    7. If it’s correct – they win that round and can keep the note as a point!
    8. If it’s wrong – the note goes back and they try again or the next player takes a turn (you decide the rules based on group size).
    9. Play continues until everyone’s had a few turns or until all questions have been answered.
    10. Count how many correct post-it notes each player has at the end.
    11. The one with the most points wins the title of Multiplication Master!
  • Fabric Sensory Tunnel

    Fabric Sensory Tunnel

    A Fabric Sensory Tunnel is a brilliant way to support babies and toddlers as they develop strength, coordination and confidence in their movements.

    Crawling through a soft tunnel gives children a fun opportunity to practise gross motor skills, build spatial awareness, and explore textures and toys along the way.

    This activity is simple to set up using things you already have at home, and can be just as fun for a baby crawling for the first time as it is for a busy toddler looking for adventure. It also makes a lovely space for quiet exploration or peekaboo play.


    Materials Needed

    • Lightweight blanket or large sheet
    • Two sturdy chairs or a soft play tunnel
    • Optional: soft toys, textured fabrics, sensory balls, cushions

    Tools Needed

    • None

    Steps

    1. Create the Tunnel
      Drape a blanket over two chairs placed a short distance apart to create a tunnel. Make sure the sides are stable and safe for crawling under.
    2. Set the Scene
      Add soft toys or textured fabrics inside the tunnel for your child to discover along the way.
    3. Encourage Exploration
      Call your baby from the other side, peek through, or gently guide them as they crawl through.
    4. Join the Fun
      Cheer them on, sing, or play peekaboo from either end of the tunnel to keep them engaged and excited.
    5. Adapt as Needed
      Let them explore in their own time — some children might enjoy crawling through, others might prefer to sit and investigate the space inside.

    Variations

    • Texture Trail: Place different fabrics or sensory mats inside the tunnel for feet and hands to explore.
    • Sound Surprise: Hide crinkly toys or rattles inside for babies to discover as they move through.
    • Glow Tunnel: Use a torch or soft fairy lights (supervised) for a magical glow inside the tunnel.
    • Reading Nook: After crawling, turn the tunnel into a quiet space with cushions and books.

    Safety Tips

    • Always supervise babies and toddlers closely during play.
    • Make sure the tunnel is stable and there’s nothing sharp or heavy that could fall.
    • Check that all fabrics and toys are clean, soft, and safe for mouthing or handling.
    • Ensure the floor is clear of trip hazards around the tunnel space.
  • Texture Treasure Basket

    Texture Treasure Basket

    Texture Treasure Baskets are a beautiful way to support your baby’s sensory development using everyday objects. By offering a small selection of safe, interesting items with different textures, shapes and weights, babies can explore the world around them in a calm, open-ended way.

    This kind of tactile play helps develop fine motor skills, curiosity, and concentration. It also supports early language learning when parents and carers describe what babies are feeling, holding and discovering.


    Materials Needed

    • Shallow basket or soft container
    • A variety of clean, baby-safe household items with different textures. Examples include:
      • Wooden spoon (smooth)
      • Silk scarf or soft fabric (slippery)
      • Natural sponge (bumpy)
      • Rubber ball (squishy)
      • Textured teething ring
      • Ribbon or string (with supervision)
      • Velcro strip or fabric with different surfaces

    Tools Needed

    • None

    Steps

    1. Prepare the Basket
      Gather 4–6 safe objects of different textures and place them in a shallow basket or soft tub.
    2. Position Baby Comfortably
      Place your baby in a seated or well-supported position on the floor or in your lap.
    3. Explore Together
      Let your baby choose which items to reach for, or offer one at a time to explore with hands and mouth.
    4. Talk About the Textures
      Describe what they’re feeling: “That’s soft”, “This one’s rough”, “Ooh, it’s cool and smooth!”
    5. Follow Their Lead
      There’s no right way to play — let your baby explore at their own pace.

    Variations

    • Themed Baskets: Try baskets based on colours, materials (e.g. natural objects), or seasonal themes.
    • Add Sounds: Include safe items that rattle, crinkle or squeak for extra sensory interest.
    • Outside Basket: On a dry day, take a nature-themed basket outdoors with grass, leaves and pebbles (with close supervision).
    • Swap Regularly: Change the items every few days to keep the basket interesting and engaging.

    Safety Tips

    • Always supervise your baby closely during sensory play.
    • Make sure all items are large enough not to be swallowed and free from sharp edges or loose parts.
    • Check that materials are clean and baby-safe — avoid anything breakable or made of toxic materials.
    • Clean and rotate items regularly to keep them safe and hygienic.
  • Tag

    Tag is a classic game that never gets old. With no setup and no special equipment needed, it’s an instant go-to for outdoor fun. One player is “it” and tries to tag the others—once someone’s tagged, they become “it,” and the chase continues!

    There are countless variations too—like freeze tag, shadow tag, or tunnel tag—that keep things fresh and fun. Whether in the backyard, park, or schoolyard, tag gets kids moving, thinking fast, and working on coordination and social play. Plus, it’s fantastic exercise disguised as a game.


    Materials Needed

    • None


    Tools Needed

    • None


    Steps

    1. Choose a Play Area: Pick a safe, open space with plenty of room to run.

    2. Select Who’s “It”: Choose one child to start as the tagger.

    3. Start the Chase: The tagger tries to touch another player, who then becomes the new tagger.

    4. Add Variations (Optional): Try freeze tag (players freeze when tagged) or shadow tag (tag by stepping on someone’s shadow).

    5. Keep It Moving: Play as long as the energy lasts!


    Variations

    Check out this list of fun variations on the classic tag game

  • Read a Book Together

    Reading a book together is one of the simplest—and most powerful—ways to connect with your child. Whether you’re revisiting an old favorite or discovering a new adventure, shared reading helps develop vocabulary, listening skills, empathy, and imagination.

    You can take turns reading aloud, use character voices, or pause to ask questions and spark conversation. Even older kids enjoy a good read-aloud, especially when paired with a cozy blanket and a quiet moment. It’s a calming, screen-free ritual that brings comfort and joy to kids of all ages.


    Materials Needed

    • A book (picture book, early reader, or chapter book based on age)


    Tools Needed

    • None


    Steps

    1. Choose a Book: Let your child pick or surprise them with a favorite.

    2. Get Comfy: Snuggle up somewhere cozy—on the couch, bed, or a blanket fort.

    3. Read Together: Read aloud with expression, or take turns if your child is reading too.

    4. Talk About It: Ask questions, share predictions, or talk about favorite characters.

    5. Repeat Often: Make shared reading a special part of your daily or weekly routine.

  • Hide and Seek

    Hide and Seek

    Sometimes, the best games are the ones that have been around forever. Hide and Seek is a beloved classic that combines movement, suspense, and creativity. Whether played with two people or a whole group, this simple game is a great way to encourage kids to be active, take turns, and even practice a little strategic thinking.

    It can be adapted for small indoor spaces or taken outdoors for bigger adventures. Plus, kids of all ages can join in the fun—no special materials or setup required. Just count, hide, seek, and repeat!

    Materials Needed

    • None!

    Tools Needed

    • None!

    Steps

    1. Choose a Seeker: Pick one player to close their eyes and count aloud (e.g., to 20 or 30).

    2. Everyone Hides: While the seeker counts, the other players hide quietly.

    3. Start the Search: Once done counting, the seeker calls “Ready or not, here I come!” and begins searching.

    4. Find the Hiders: The game ends when all players are found.

    5. Switch Roles: The first person found becomes the next seeker—or create your own house rules.