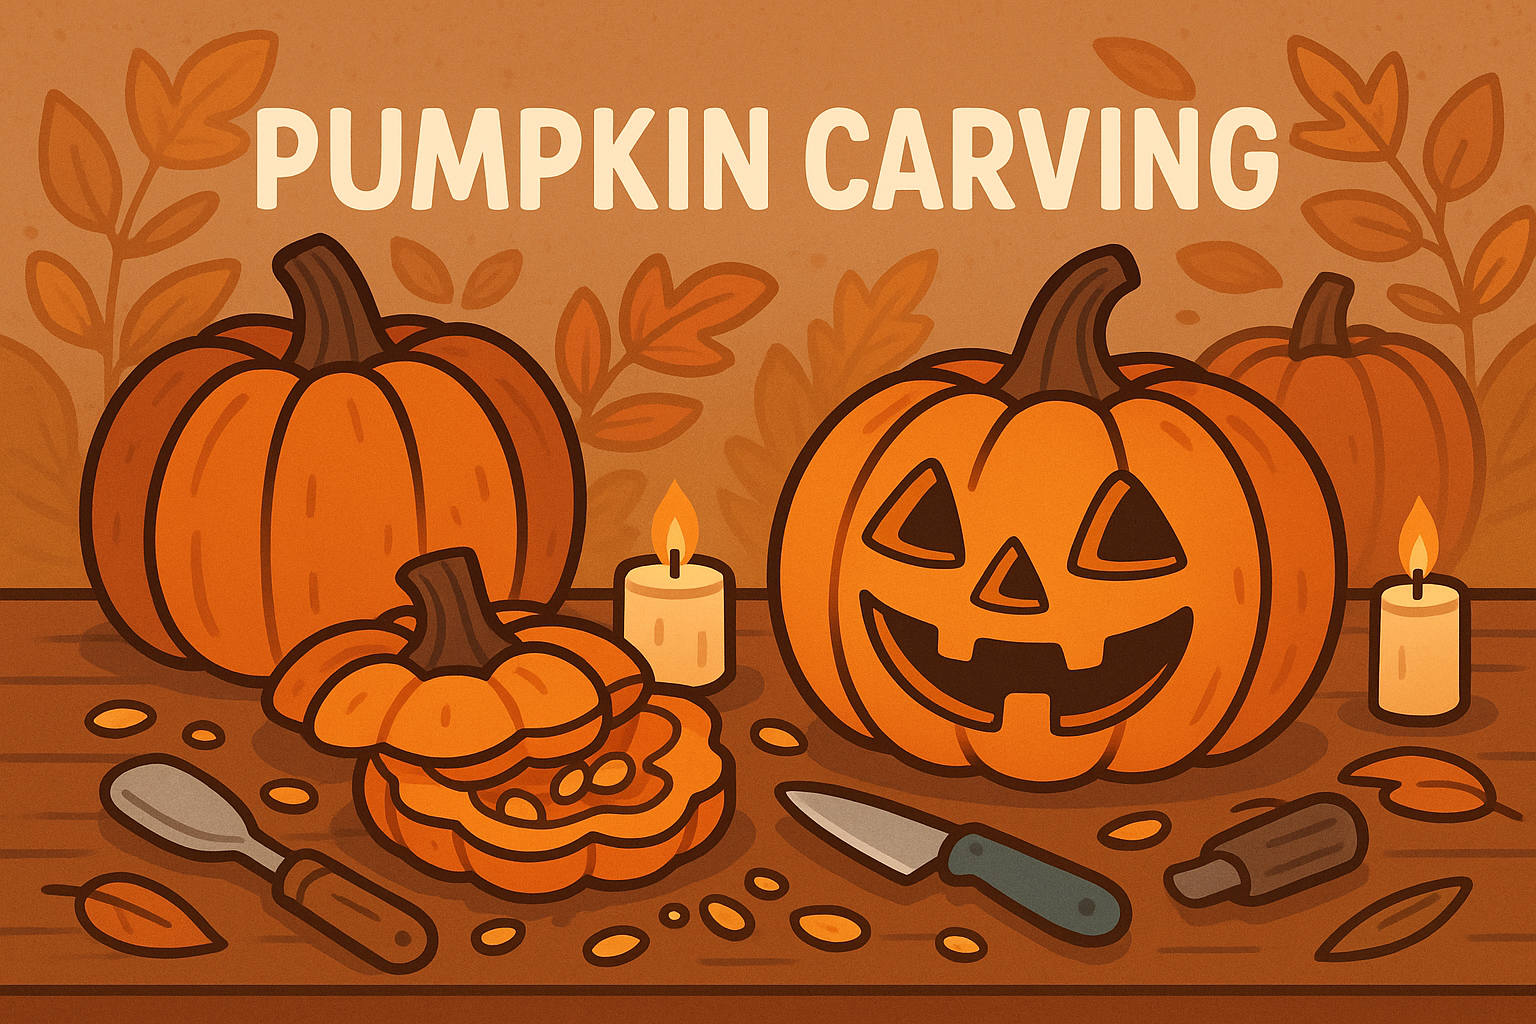
Parental Involvement: High

  • Elderflower Cordial

    Elderflower Cordial

    Making elderflower cordial is a magical blend of outdoor adventure and kitchen creativity.

    Children will love foraging for the frothy white blossoms, learning how to identify them safely, and then helping prepare a fragrant, refreshing cordial to enjoy at home.

    This seasonal activity introduces kids to the basics of foraging, food preparation and patience (the cordial needs to steep overnight), while also connecting them to nature and the rhythms of the year. It’s perfect for spring and early summer, when elderflowers are in bloom.


    Materials Needed

    • 20–30 elderflower heads (fully open and freshly picked)
    • 1.5 kg granulated sugar
    • 1.2 litres water
    • 2 lemons (sliced)
    • 50g citric acid (optional but helps preserve)

    Tools Needed

    • Large saucepan
    • Wooden spoon
    • Clean cloth or muslin for straining
    • Large bowl or jug
    • Sterilised glass bottles or jars

    Steps

    1. Go Foraging
      Head out to a safe area away from roads and pollution. Pick elderflower heads that are fully open, white, and smell sweet (avoid browning ones).
    2. Shake and Rinse
      Gently shake off bugs outside. Rinse flowers lightly if needed, but not too much — you want to keep the flavourful pollen.
    3. Make Sugar Syrup
      Boil the water and stir in the sugar until dissolved. Let it cool for a few minutes.
    4. Add Ingredients
      Add the elderflower heads, sliced lemons, and citric acid (if using) to the syrup. Cover and leave to steep for 24 hours.
    5. Strain and Bottle
      Pour the mixture through a muslin or clean cloth into a bowl, then transfer to sterilised bottles. Store in the fridge and enjoy diluted with water.

    Variations

    • Flavour Boost: Add a few sprigs of mint or a splash of orange juice for extra freshness.
    • Ice Lollies: Freeze the cordial into ice pop moulds for a homemade summer treat.
    • Sparkling Version: Mix cordial with sparkling water for fizzy elderflower lemonade.

    Check out our Elderflower Fritters recipe!


    Safety Tips

    • Always supervise children when foraging and make sure they know not to eat plants without adult approval.
    • Only pick elderflowers you are confident identifying — avoid any lookalikes.
    • Be cautious with boiling water and sharp tools during the preparation phase.
    • Label homemade bottles clearly and store in the fridge.
  • Make Muffins

    Make Muffins

    Baking muffins is a brilliant way to spend time together in the kitchen while teaching practical life skills.

    Kids can help with measuring, pouring, stirring, and even cracking eggs — all under supervision. It’s a great introduction to following instructions and exploring what happens when ingredients are combined and cooked.

    You can keep things simple with a basic vanilla or banana muffin, or get creative with add-ins like blueberries, chocolate chips, or grated carrot. Once baked, enjoy them together with a cuppa or pop some aside for lunchboxes.


    Materials

    • 1½ cups self-raising flour
    • ½ cup sugar
    • 1 tsp baking powder
    • 1 egg
    • ¾ cup milk
    • ¼ cup melted butter or oil
    • Optional add-ins: chocolate chips, blueberries, banana, cinnamon, etc.
    • Muffin cases and tin

    Tools

    • Mixing bowl
    • Measuring cups/spoons
    • Wooden spoon or whisk
    • Oven (adult use only)

    Steps

    1. Preheat the oven to 180°C (fan).
    2. In a bowl, mix the dry ingredients: flour, sugar, baking powder.
    3. In a separate bowl, whisk together the egg, milk, and melted butter or oil.
    4. Pour the wet mix into the dry and stir until just combined — don’t overmix!
    5. Fold in any extras like fruit or chocolate chips.
    6. Spoon into muffin cases and bake for 18–22 minutes or until golden and springy.
    7. Cool slightly before enjoying warm or storing for later.

    Variations

    • Mini Muffins: Use a mini muffin tray for bite-sized treats, ideal for younger kids.
    • Allergy-Friendly: Use plant-based milk or egg substitutes for dairy-free or egg-free versions.
    • Seasonal Flavours: Add cinnamon and apple in autumn, or lemon zest and berries in summer.

    Why It’s Great

    • Real-Life Maths – Involves measuring, timing and following steps in order.
    • Fine Motor Skills – Stirring, scooping and pouring help build hand coordination.
    • Shared Achievement – Children get to enjoy the results of something they helped make.

    Safety Tips

    • Always supervise children closely when using the oven and handling hot items.
    • Remind children about food hygiene — wash hands before cooking and avoid tasting raw mix with eggs.
    • Cool baked goods before little ones touch or eat them.
  • Finger Puppet Fun

    Finger Puppet Fun

    Finger Puppet Fun is a gentle and engaging way to introduce babies to imaginative play and social interaction.

    Using a set of finger puppets — or even socks with faces drawn on — you can create a playful little world where characters pop up, talk, and interact in fun and silly ways.

    This kind of play supports early communication skills, emotional connection and curiosity. It also gives babies a chance to practise reaching, grabbing and following movement — all important for early development.


    Materials Needed

    • Finger puppets; shop-bought or homemade (video below)
    • Optional: clean socks with drawn-on or sewn faces
    • Blanket or soft toy stage (optional for added fun)

    Tools Needed

    • None

    Steps

    1. Pick Your Puppets
      Choose one or two finger puppets — animals, people, or made-up creatures work well.
    2. Say Hello
      Use different voices and gentle movements to bring the puppets to life. Introduce them to your baby — “Hello! I’m Bunny!”
    3. Encourage Interaction
      Let your baby watch, reach for, or gently grab the puppets. Respond to their movements with playful reactions.
    4. Tell a Mini Story
      Create a short, simple interaction — like two puppets singing, hiding behind your hands, or giving cuddles.
    5. Follow Baby’s Lead
      If your baby wants to hold the puppet or explore it with their mouth, that’s part of the fun too!

    Variations

    • DIY Puppet Craft: Make your own using socks, felt, or card cut-outs glued to pegs or fingers.
    • Mirror Play: Let your baby watch the puppets (and themselves) in a mirror for added engagement.
    • Sing Along: Use puppets to act out nursery rhymes or songs like “Old MacDonald” or “Twinkle Twinkle.”
    • Storytime Companion: Let a puppet ‘read’ a book or react to storytime moments with your child.

    Safety Tips

    • Supervise closely, especially if your baby mouths the puppets.
    • Make sure any homemade puppets are securely made — avoid small parts that could come loose.
    • Keep the play gentle and go at your baby’s pace. Stop if they seem overstimulated or need a break.

    DIY Paper Finger Puppets

  • Kitchen Sound Lab

    Kitchen Sound Lab

    The Kitchen Sound Lab is a fun, noisy way for toddlers to explore sound, rhythm and movement using safe, everyday objects. By setting up a mini percussion station with wooden spoons, pots, and bowls, children can experiment freely with tapping, banging, scraping and stirring — all while building coordination and learning about cause and effect.

    It’s a great opportunity for sensory play and early music exploration, especially for little ones who love to move and make noise. Best of all, it’s easy to set up and tidy away — and might even give grown-ups a mini concert while cooking dinner!


    Materials Needed

    • Wooden spoons or silicone utensils
    • Plastic or metal mixing bowls
    • Pots, pans or baking trays (lightweight and safe)
    • Optional: measuring cups, whisks, or lids for variety

    Tools Needed

    • None

    Steps

    1. Choose a Safe Space
      Set up on the kitchen floor, a play mat, or a low table where your child can reach everything safely.
    2. Introduce the “Instruments”
      Show your child how each item makes a different sound — a bowl might ring, a lid might clang, a spoon might thud.
    3. Let Them Explore
      Encourage your toddler to bang, stir, and tap however they like. There’s no wrong way to play!
    4. Add Rhythm
      Clap a beat or sing a song while they play along, or take turns creating rhythms for each other to copy.
    5. Pack Away Together
      When playtime’s over, involve your child in putting everything back — it helps build routines and responsibility too.

    Variations

    • Sound Sorting: Talk about which items sound high or low, loud or soft.
    • Kitchen Band: Join in and create rhythms together — you can even record your mini jam session!
    • Texture Tapping: Add a sponge, brush or silicone mat to explore how different materials affect the sound.
    • Quiet vs Loud: Practise changing volume and tempo — a great intro to musical dynamics.

    Safety Tips

    • Only use safe, clean items with no sharp edges or heavy parts that could fall or tip over.
    • Always supervise — especially if younger siblings or pets are nearby.
    • Keep hot appliances and breakables well out of reach during kitchen play.
  • Go Foraging

    Go Foraging

    Foraging with children is a brilliant way to explore the outdoors and discover what nature has to offer.

    From wild garlic in spring to blackberries in late summer, learning how to identify and gather edible plants fosters curiosity, seasonal awareness and respect for the environment.

    Children can help spot and pick (with guidance), learn which plants are safe and which are not, and enjoy turning their finds into simple recipes or nature crafts back at home. It’s a great mix of movement, mindfulness and science — with a tasty reward at the end!


    Why It’s Great

    • Nature Connection – Encourages children to slow down, observe closely and engage with the changing seasons.
    • Hands-On Learning – Teaches basic botany, food knowledge and sustainable harvesting practices.
    • Family Bonding – A chance for shared exploration and gentle adventure.
    • Confidence Outdoors – Builds children’s sense of independence and environmental care.

    How to Get Started

    • Go with a trusted foraging guidebook or app, or join a local guided walk.
    • Start with easy-to-identify species like wild garlic, blackberries or elderflowers.
    • Teach children the key rule: “If you’re not 100% sure, don’t pick or eat it.
    • Bring small containers, gloves (optional), and wipes or water for cleaning hands.

    Resources


    Variations

    • Urban Foraging: Look for wild edibles in parks, canal paths, or hedgerows.
    • Seasonal Foraging: Blackberries (late summer), sloes (autumn), nettles (spring).
    • Craft Foraging: Collect fallen leaves, feathers or acorns for nature crafts rather than food.

    Safety Tips

    • Only forage what you can confidently identify — many plants have poisonous lookalikes.
    • Avoid busy roads, areas near dog-walking routes, or places that may be sprayed with pesticides.
    • Teach children never to taste or pick without an adult’s go-ahead.
    • Pick respectfully: leave plenty for wildlife and future foragers.
  • Rockpooling

    Rockpooling

    Rockpooling is a magical way for children to discover the fascinating marine world up close.

    As the tide goes out, small pools of seawater are left behind in rocky areas, offering the chance to spot tiny crabs, limpets, sea anemones, fish, starfish and other coastal creatures.

    All you need is curiosity (and maybe a bucket or magnifying glass), and a willingness to tread gently as you explore. It’s a great way to encourage appreciation for nature, introduce marine science, and enjoy slow, mindful discovery time by the sea.


    Materials

    • Small bucket or container (optional)
    • Net (optional, use gently and sparingly)
    • Magnifying glass
    • Wellies or beach shoes
    • Waterproofs or layers, depending on weather

    Tools

    • None

    Steps

    1. Visit a beach with rocky areas and known rockpools — check tide times and aim for low tide.
    2. Walk slowly and carefully, looking into the pools without disturbing the creatures.
    3. Use a magnifying glass to get a closer look at small animals, shells and algae.
    4. If using a net or bucket, always return animals to where they came from gently and promptly.
    5. Chat about what you find — try identifying creatures or simply enjoy observing them.

    Variations

    • Creature Count: How many different animals or colours can be spotted?
    • Sketch It: Bring a notebook to draw some of your favourite finds.
    • Mini Marine Journal: Keep a log of different rockpool creatures you see on different beach visits.

    Why It’s Great

    • Builds Respect for Nature – Encourages gentle interaction and care for living things.
    • Sparks Curiosity – Inspires questions and early science exploration.
    • Mindful Outdoor Play – Combines movement with focused observation and calm exploration.

    Safety Tips

    • Always supervise near water and rocks — surfaces may be slippery.
    • Check tide times and avoid getting caught as the water comes in.
    • Handle sea creatures gently, and return them quickly to their original spot.
    • Wash hands after exploring, especially before eating.
  • Cook a Meal

    Cook a Meal

    Getting children involved in cooking is a fantastic way to build confidence, introduce basic kitchen skills and spend meaningful time together.

    With a little preparation, even younger children can help measure, mix, stir or arrange ingredients, while older kids can take on more responsibility as they grow.

    It’s not about perfection — it’s about having fun, trying new things, and creating something you can enjoy together at the table afterwards. Plus, children are often more open to trying new foods when they’ve helped to make them!


    Materials Needed

    • Ingredients for your chosen meal (see meal ideas below)
    • Apron or old clothes
    • Cleaning cloths or wipes for quick tidy-ups

    Tools Needed

    • Basic kitchen utensils (mixing bowl, spoons, knives, chopping board, pans etc.)
    • Adult supervision and help for any cutting, heat or sharp tools

    Steps

    1. Pick a Recipe Together
      Choose something simple, safe and age-appropriate that your child is excited to make (see ideas below).
    2. Set Up the Kitchen
      Get all ingredients and tools ready. Assign child-friendly tasks depending on age and confidence.
    3. Cook as a Team
      Support your child while they measure, mix, pour, stir, or assemble.
    4. Serve and Enjoy
      Celebrate the meal you’ve made together. Let your child take pride in helping to cook.
    5. Tidy Up Together
      Involve children in the clean-up as part of the process.

    Easy Kid-Friendly Meal Ideas

    • Wraps or Sandwiches: Let kids fill wraps with ham, cheese, salad, hummus, or even banana and peanut butter.
    • Homemade Pizza: Use shop-bought bases or pitta bread. Children can spread sauce and add their own toppings.
    • Pasta and Sauce: Let kids stir the sauce, sprinkle cheese, or choose veggies to stir through cooked pasta.
    • Fruit Salad: Kids can help peel, chop soft fruit (with supervision), and mix everything together.
    • Omelettes: Older children can beat eggs, add fillings, and help carefully cook with support.
    • DIY Nachos: Arrange tortilla chips, grated cheese and toppings on a tray and bake.
    • Quesadillas: Simple cheese and ham quesadillas can be assembled by kids and cooked by adults.
    • Mini Burgers: Let kids help shape burger patties or assemble buns with toppings.
    • Breakfast Bowls: Layer yoghurt, fruit, granola or cereals for an easy, nutritious option.

    Variations

    • Theme Nights: Have a ‘Mexican night’ or ‘Breakfast-for-Dinner’ night and plan a few simple dishes together.
    • Chef’s Hat: Let kids wear a chef’s hat or apron to feel extra involved.
    • Decorate the Table: Get creative with folded napkins, placemats or table decorations made by the kids.
    • Recipe Book: Start a family cooking journal where your child can write or draw the meals they’ve helped make.

    Safety Tips

    • Always supervise children when using knives, heat or sharp tools.
    • Use age-appropriate utensils (e.g. child-safe knives for younger children).
    • Teach safe hand washing, hygiene, and basic kitchen safety rules from the start.
    • Keep pan handles turned inward and hot surfaces well out of reach of younger children.
  • What’s Missing?

    What’s Missing?

    When you’re out and about and need something quick to keep little ones entertained while waiting—like at a restaurant—What’s Missing? is a perfect go-to game. It helps children practise memory and observation skills in a playful, low-pressure way. No equipment needed—just the items already on the table!

    It’s simple enough for young children but still encourages focus, patience, and those little giggles when they spot what’s been taken away.


    Materials Needed

    • Everyday objects already on the table (cutlery, napkin, salt shaker, etc.)

    Tools Needed

    • None

    Steps

    1. Set the Scene
      Pick 3–5 objects from the table and arrange them in front of your child.
    2. Close Eyes and Count
      One person closes their eyes and slowly counts to 10 (or however long works).
    3. Remove an Item
      While their eyes are closed, quietly hide one object under the table or in your lap.
    4. Guess What’s Missing
      When they open their eyes, they guess which item has disappeared.
    5. Take Turns
      Swap roles and keep playing for as long as it holds their interest.

    Variations

    • More Items: For older children, add more objects to make it trickier.
    • Timed Version: See how quickly they can spot what’s missing.
    • Story Starter: After finding what’s missing, invent a short story about where the item went!
    • Memory Challenge: Before removing anything, have your child name each item to reinforce recall.
  • Geocaching

    Geocaching

    Geocaching turns an ordinary walk into a real-life treasure hunt.

    Using a GPS-enabled phone or handheld device, you search for small hidden containers—called “geocaches”—that others have tucked away in parks, woods, or even city streets. Inside you’ll often find a logbook to sign, and sometimes a few little trinkets to trade.

    It’s a fun way to explore, problem-solve, and enjoy nature as a team. Plus, it adds a sense of purpose and discovery to your outdoor time, especially for children who love puzzles or hidden secrets.


    Materials Needed

    • Smartphone or GPS device
    • Free geocaching app (like Geocaching® or Cachly)
    • Small trinkets to swap (optional)
    • Pen or pencil (to sign the logbook)

    Tools Needed

    • Geocaching app or website access

    Steps

    1. Download a Geocaching App
      Pick a free app and create an account—it’ll help you find nearby geocaches on a live map.
    2. Choose a Cache
      Look for a geocache with a difficulty rating that suits your child’s age and your available time.
    3. Set Out on the Hunt
      Follow the clues and coordinates to find the hidden container. Take your time and let kids do the spotting.
    4. Log Your Find
      Open the container, sign the logbook, and swap a small item if you’d like. Be sure to re-hide it just as you found it!
    5. Keep Exploring
      Head to another cache nearby or save it as a regular adventure to look forward to.

    Variations

    • Make Your Own Cache: Hide a geocache near your home or a local park and register it on the app.
    • Treasure Bag: Bring a bag of small swaps like keyrings or stickers to make each find extra exciting.
    • Mini Journal: Keep a small notebook to log your finds, draw maps, or rate your favourites.
    • Themed Hunts: Look for geocaches based around history, nature trails, or urban landmarks.

    Safety Tips

    • Always supervise children closely, especially near roads, water, or unfamiliar terrain.
    • Bring a charged phone, water, and sun/rain protection.
    • Only take or swap items if the geocache allows it, and leave the container exactly as you found it.
    • Use hand sanitiser after handling shared containers, especially before eating.
  • Emotion Cards

    Emotion Cards

    Emotion Cards are a simple, thoughtful way to help children explore feelings in a safe and supportive space.

    By writing down different emotions on pieces of card, then taking turns to pick one and talk about it, children (and grown-ups!) can build emotional vocabulary, share experiences, and connect more deeply.

    This activity helps support emotional intelligence, listening skills, and self-expression—and can be as light or meaningful as the moment calls for. It’s a lovely way for parents, carers, and children to learn more about each other too.


    Materials Needed

    • Coloured card or plain paper
    • Pen, pencil, or marker
    • Scissors

    Tools Needed

    • None

    Steps

    1. Make the Cards
      Cut card or paper into equal-sized pieces. Write a different emotion on each one. E.g.
      • Happy
      • Sad
      • Angry
      • Excited
      • Nervous
      • Proud
      • Scared
      • Calm
      • Lonely
      • Curious
      • Frustrated
      • Loved
    2. Mix and Choose
      Shuffle the cards and take turns drawing one at random.
    3. Talk About It
      Share a time you felt that way or something that makes you feel that emotion. There’s no right or wrong—just sharing and listening.
    4. Encourage Openness
      If your child prefers not to share, that’s okay. They might just want to listen or come back to it later.
    5. Keep It Going
      Use the cards regularly as part of bedtime chats or quiet moments together.

    Variations

    • Draw the Emotion: Let children illustrate each feeling card with a face, colour, or scene.
    • Feeling Charades: Pick a card and act out the emotion for others to guess.
    • Story Starter: Use the chosen emotion as a prompt to make up a short story together.
    • Calm-Down Pairing: Create a second set of cards with ways to respond to difficult emotions (e.g. take a breath, ask for help).
  • Do the Dishes

    Do the Dishes

    Doing the dishes might not sound like a game — but for many children, especially younger ones, it can be a joyful, splashy activity.

    With warm water, soapy bubbles, and a bit of responsibility, even a simple chore can turn into a meaningful moment. Children love to feel helpful, and getting involved in everyday routines builds confidence, coordination, and independence.

    Whether it’s washing plastic cups, stacking dishes, or drying with a tea towel, there’s a job for every age — and it’s a great way to spend time together while getting something done.


    Materials Needed

    • Washing up bowl or sink with warm water
    • Washing up liquid
    • Plastic or unbreakable dishes for younger children
    • Sponges or brushes
    • Tea towels

    Tools Needed

    • Step stool (if needed to reach the sink)

    Steps

    1. Set Up the Space
      Fill a sink or washing-up bowl with warm soapy water and make sure your child can reach comfortably and safely.
    2. Choose the Right Items
      Give them child-safe dishes, plastic cups or utensils to wash.
    3. Wash and Rinse
      Let them wash with a sponge or cloth, then rinse clean. Expect some splashing — that’s part of the fun!
    4. Dry and Put Away
      Older children can dry dishes or help return them to cupboards with supervision.
    5. Celebrate Helping
      Thank them for their help and chat about how they’re part of the team.

    Variations

    • Role-Play Café: Pretend they’re the café washer-upper and on a big shift!
    • Bubbles Galore: Add a bit of extra washing-up liquid and let them enjoy the sensory fun of the bubbles.
    • Toy Wash: Wash play dishes, toy food or waterproof dolls alongside real dishes.
    • Drying Race: With older kids, time how quickly (and carefully) they can dry and stack five items.

    Safety Tips

    • Always supervise young children around water and slippery floors.
    • Use warm (not hot) water, and give younger children only unbreakable or lightweight items.
    • Make sure stools or chairs used for reaching are stable and safe.
    • Keep sharp or heavy utensils well out of reach.
  • Water Play Tub

    Water Play Tub

    Water play is a fantastic hands-on activity that offers both calm, focused exploration and joyful splashing.

    With just a shallow container, a few household items, and supervision, you can create a mini water world that encourages sensory development, coordination, and imaginative thinking.

    It’s ideal for toddlers and young children, especially when you’re looking for something simple that holds their attention. Whether scooping, pouring, floating or sinking, there’s always something new to discover.


    Materials Needed

    • Shallow container, tray, washing-up bowl, or plastic tub
    • Water (warm water can be soothing indoors)
    • Plastic cups, spoons, ladles, jugs, small containers
    • Optional: toy animals, boats, bath toys, sponges, shells, ice cubes

    Tools Needed

    • None

    Steps

    1. Prepare the Space
      Place the tub on a waterproof mat, towel, or in an outdoor spot. Fill with a few inches of water.
    2. Add Tools and Toys
      Set out a variety of safe items to scoop, pour, stir and splash with.
    3. Encourage Exploration
      Let your child lead—watch how they interact and join in if invited!
    4. Talk and Play
      Use language like “sink”, “float”, “pour”, or “heavy” to build vocabulary while you play.
    5. Tidy Up Together
      Let your child help tip out the water and dry the tools—it’s part of the fun.

    Variations

    • Coloured Water: Add a drop of food colouring for a visual twist.
    • Ice Play: Add a few ice cubes and talk about melting and temperature.
    • Bubble Tub: Add a small squirt of baby-friendly bubble bath for extra sensory fun.
    • Theme It: Make an ocean, farm, or car wash scene with toys you already have.

    Safety Tips

    • Always supervise children closely around water, even very shallow amounts.
    • Keep the play area slip-free—use towels or non-slip mats if indoors.
    • Choose toys that are safe for the age group and avoid anything that can break or has sharp edges.
    • Empty the water immediately after play and store containers safely.
  • Build a Campfire

    Build a Campfire

    There’s something special about gathering around a real campfire—watching the flames flicker, sharing stories, roasting marshmallows, and enjoying time outdoors. Building a campfire together can be a brilliant bonding experience and a great way to teach children about responsibility, safety, and the natural world.

    This activity works best in a garden fire pit, a campsite, or a designated outdoor area where fires are allowed. Always supervise children closely and talk them through every step of the process.


    Materials Needed

    • Dry sticks, twigs, and kindling (e.g. newspaper)
    • Larger logs or split wood
    • Fire pit or safe fire circle
    • Matches or firelighters
    • Optional: marshmallows, skewers, foil-wrapped snacks

    Tools Needed

    • Fireproof gloves or tongs (for adult use)
    • Bucket of water or sand (for extinguishing)

    Steps

    1. Choose a Safe Spot
      Use a designated fire pit or build a fire circle with stones in a clear, flat area.
    2. Gather Materials
      Collect dry twigs for kindling, medium sticks, and larger logs. Avoid green or damp wood.
    3. Build the Fire
      Arrange kindling in a pyramid or teepee shape. Layer slightly larger sticks around it, with logs added once the fire is established.
    4. Light the Fire
      An adult should light the fire using matches or a firelighter. Keep your body back and hands safe.
    5. Enjoy and Maintain
      Keep the fire at a manageable size. Toast snacks, tell stories, and enjoy—but never leave it unattended.
    6. Extinguish Properly
      Use water or sand to fully douse the fire. Stir the ashes to ensure all embers are out.

    Variations

    • Campfire Cooking: Wrap bananas in foil with chocolate, or toast bread on sticks.
    • Storytelling Circle: Take turns telling funny, spooky, or made-up stories.
    • Nature Firecraft: Teach children how to identify safe tinder and kindling in the wild.
    • Fire-Free Option: If you can’t light a real fire, use battery-powered candles for indoor storytelling.

    Safety Tips

    • Always supervise children closely around fire—never leave it unattended.
    • Remove any potential trip hazards from near the fire.
    • Keep a bucket of water or sand nearby at all times.
    • Use long sticks or skewers for cooking, and teach children not to touch the firewood or flames.
    • Only build fires in appropriate areas (never on dry grass or near buildings).
    • Ensure the fire is fully extinguished before leaving the area.
  • Peek-a-boo

    Peek-a-boo

    Peek-a-boo is one of the earliest games babies can enjoy, and it’s packed with developmental benefits.

    It may seem simple, but each time a familiar face disappears and reappears, your baby is learning that things exist even when they can’t see them—an important concept known as object permanence.

    This game also builds social connection, supports early communication, and sparks plenty of giggles. It’s an easy go-to at home, during nappy changes, or while out and about—and it never requires any equipment.


    Materials Needed

    • None (optional: muslin, blanket, or soft toy)

    Tools Needed

    • None

    Steps

    1. Get Baby’s Attention
      Make eye contact and smile to engage your little one.
    2. Hide Your Face
      Cover your face with your hands, a blanket, or soft toy and say “Where’s Mummy/Daddy?”
    3. Reveal and Smile
      Uncover your face and say “Peek-a-boo!” with a happy, surprised expression.
    4. Repeat
      Repeat a few times, pausing slightly each round to build anticipation.
    5. Let Baby Play Too
      As they grow, encourage them to do the hiding—using their hands or a toy.

    Variations

    • Blanket Peek-a-Boo: Hide behind a muslin or towel and drop it with a flourish for extra effect.
    • Toy Peek-a-Boo: Use a favourite soft toy to pop out from behind a cushion or book.
    • Mirror Play: Sit in front of a mirror and watch baby react to both of your reflections.
    • Song Version: Add a tune—“Where is [Name]? Where is [Name]?… Peek-a-boo!”
  • Join a Sports Club

    Join a Sports Club

    Joining a local sports club is more than just a way to burn off energy—it’s a fantastic opportunity for children to learn discipline, build confidence, and make new friends in a fun, structured environment.

    Whether your child is into football, swimming, martial arts, dance, rugby, or gymnastics, there’s a sport to suit every personality and ability level. Regular sessions help develop physical fitness and resilience while supporting teamwork and emotional wellbeing.


    Materials Needed

    • Appropriate sports kit (e.g. trainers, kit bag, uniform if required)
    • Water bottle
    • Any required safety gear (e.g. shin pads, gumshield, helmet)

    Tools Needed

    • None (equipment usually provided by the club)

    Steps

    1. Explore Local Options
      Search online or ask around for clubs in your area that offer taster sessions or beginner-friendly classes.
    2. Pick a Sport
      Talk to your child about what they’d like to try. Let them take the lead in choosing something they’re excited about.
    3. Attend a Taster
      Many clubs offer free or low-cost trial sessions to help children see what it’s like before committing.
    4. Join the Club
      Once they’ve found a good fit, sign up for regular sessions and support them as they settle in.
    5. Celebrate Progress
      Whether they score a goal, learn a new move, or just stick with it, recognise their efforts and growth.

    Variations

    • Try Multiple Sports: Not sure what to choose? Explore different clubs across a term or summer holidays.
    • Inclusive Options: Look for clubs that offer adapted sessions for children with additional needs or preferences.
    • Parent and Child Classes: Try sports sessions where parents and kids can participate together, such as family yoga or mini rugby.
    • Make It Social: Go with a friend or encourage a sibling to join—it can ease nerves and boost confidence.
  • Go to a Museum

    Go to a Museum

    A trip to a museum turns a day out into a learning adventure. Whether it’s ancient artefacts, dinosaur skeletons, interactive science exhibits or contemporary art, museums are packed with opportunities for children to explore new ideas and discover fascinating facts.

    It’s a hands-on, real-world way to encourage curiosity, spark conversations, and support topics children might be learning about at school or home. Many museums are free or offer family-friendly pricing, making it a fantastic budget-friendly day out too.


    Materials Needed

    • Entry tickets (if required)
    • Notebook and pencils (optional, for sketches or notes)
    • Water bottle and snack

    Tools Needed

    • Phone or camera (optional, for photos—if permitted)

    Steps

    1. Choose a Museum
      Pick one that suits your child’s interests—science, transport, history, nature, art, or local heritage.
    2. Plan Your Visit
      Check the opening times, exhibitions, and whether there are special children’s activities available.
    3. Explore Together
      Let your child lead the way or explore specific areas of interest at their own pace.
    4. Ask Questions
      Talk about the displays: “What do you think this was used for?” or “Which one is your favourite and why?”
    5. Follow Up
      Draw a favourite object, look up more information at home, or find a book that ties in with what you saw.

    Variations

    • Museum Scavenger Hunt: Make a list of things to find—like “something made of metal” or “a creature with wings”.
    • Mini Sketchbook: Bring a notebook and encourage quick drawings of objects or exhibits that stand out.
    • Photo Challenge: If photos are allowed, challenge your child to capture 5 of their favourite finds.
    • Repeat Visits: Try returning to the same museum with a different focus each time—history one day, animals the next!
  • Visit a Library

    Visit a Library

    Visiting the library is a wonderfully calm yet stimulating activity for children of all ages. It’s a place where they can explore books, discover new interests, and enjoy stories in a peaceful, welcoming space—all for free!

    Whether your child enjoys picture books, audiobooks, fact-filled encyclopaedias, or graphic novels, the library offers something for everyone. Many also host storytimes, craft sessions, or seasonal events, making each visit a little different.


    Materials Needed

    • Library card (if borrowing books)
    • Bag for carrying books home
    • Optional: reading list or themed challenge

    Tools Needed

    • None

    Steps

    1. Find a Library
      Check opening hours and look at what’s available—some libraries have special children’s corners or weekend events.
    2. Explore the Shelves
      Let your child browse freely or help them find books based on their interests.
    3. Choose a Few Books
      Borrow a mix—familiar favourites and something new.
    4. Read Together
      Find a cosy spot and enjoy a story right there in the library.
    5. Bring the Books Home
      Make a plan to come back and swap them when you’re ready for more.

    Variations

    • Library Bingo: Create a challenge sheet (e.g. “find a book with a dragon”, “borrow a non-fiction book”).
    • Storytime Sessions: Join a group reading or rhyme time event, if available.
    • Themed Trips: Choose a topic like space, animals, or art and hunt for books around that theme.
    • Book Journal: Start a simple notebook for your child to record or draw what they’ve read.
    • Combine with other activities: Combine your library trip with a bike ride, a hike, or a picnic in the park.
  • Baby Bubble Time

    Baby Bubble Time

    Baby Bubble Time is a beautiful way to engage even the youngest children in gentle, playful sensory exploration.

    Watching bubbles float, shimmer and pop encourages visual tracking and concentration, while reaching to pop them helps develop hand-eye coordination and motor skills.

    It’s also a lovely bonding activity. Talking softly to your baby while blowing bubbles supports early language development and emotional connection. Whether you’re indoors or outside, this calm, joyful play is simple, safe, and full of wonder.


    Materials Needed

    • Bottle of bubble solution
    • Bubble wand or blower
    • Optional: soft blanket or mat for baby to sit or lie on

    Tools Needed

    • None

    Steps

    1. Get Comfortable
      Lay your baby on a soft blanket or hold them safely in your arms or lap, depending on their age.
    2. Blow Bubbles Gently
      Blow a few slow bubbles into the air nearby, giving your baby time to notice and watch them.
    3. Talk About What You See
      Use simple, gentle language: “Look at that big one!”, “It popped!”, “Here comes another!”
    4. Encourage Interaction
      If your baby reaches out with hands or kicks their feet, celebrate it! “You got one!”
    5. Keep It Calm
      Stop when your baby loses interest or has had enough stimulation — a few minutes is plenty for young babies.

    Variations

    • Outdoor Bubble Time: On warm days, take the activity outside and watch the bubbles float in the breeze.
    • Tummy Time Bubbles: Blow bubbles while your baby is doing tummy time to help encourage head lifting and reaching.
    • Bubble Bath Play: Use baby-safe bubble bath and gently pop bubbles together during bath time.
    • Music & Bubbles: Play soft music while blowing bubbles for a calming, multi-sensory experience.

    Safety Tips

    • Always supervise babies closely during bubble play.
    • Use non-toxic, baby-safe bubble solution.
    • Avoid letting bubbles land directly on your baby’s face or eyes.
    • Make sure the floor or play area doesn’t become slippery from popped bubbles.
  • Footprint Painting

    Footprint Painting

    Footprint painting is a playful, sensory art activity that introduces babies to colour, texture and movement in a gentle, supervised way. By painting the soles of their feet and pressing them onto paper, little ones start to build awareness of their bodies while also enjoying the tickly sensation and bright colours.

    It’s also a beautiful way to create keepsakes — whether it’s a rainbow of tiny prints or a one-off for a card or frame. While it’s a bit messy, it’s easy to set up and keeps clean-up manageable with a bit of preparation.


    Materials Needed

    • Washable, non-toxic baby-safe paints
    • Paintbrush or sponge
    • A4 or larger paper
    • Baby wipes and towel for clean-up
    • Protective mat, old newspaper or plastic sheet

    Tools Needed

    • None

    Steps

    1. Set Up the Area
      Lay down newspaper or a splash mat to protect your surface, and keep baby wipes and a towel nearby.
    2. Prepare the Paint
      Pour a small amount of paint into a tray or onto a palette.
    3. Paint the Feet
      Use a soft brush or sponge to gently apply a thin layer of paint to the soles of your baby’s feet.
    4. Make the Prints
      Carefully press each foot onto the paper. You can make one big print, a trail of prints, or layer different colours for fun effects.
    5. Talk as You Go
      Describe what’s happening: “This feels tickly!”, “That’s your blue foot!”, “Look at the shape we made!”
    6. Clean Up
      Use wipes and a towel to clean feet straight away, and wash hands if your baby has been exploring the paint too.

    Variations

    • Seasonal Prints: Turn footprints into themed art like hearts, flowers, or reindeer hooves for cards or gifts.
    • Handprint & Footprint Combo: Try combining handprints and footprints on one page for added variety.
    • Colour Mixing: Use two or three colours to explore blending and overlapping shapes.
    • Frame It: Mount your favourite print on card and frame it as a keepsake or gift.

    Safety Tips

    • Always supervise closely — babies may want to explore the paint with their hands or mouths.
    • Use only baby-safe, non-toxic, washable paints.
    • Keep the floor non-slip and support your baby securely throughout.
    • Clean up promptly to avoid irritation or paint drying on skin.
  • Rolling Ball Game

    Rolling Ball Game

    The Rolling Ball Game is a lovely early play activity that helps babies and toddlers develop coordination, social skills, and shared attention. It’s simple, gentle, and doesn’t require any fancy equipment — just a soft ball and a few quiet minutes together.

    As you roll the ball back and forth, your baby is learning about turn-taking, cause and effect, and body movement — all while bonding with you through eye contact, sound, and facial expressions.


    Materials Needed

    • Soft, lightweight ball (foam, fabric or rubber)

    Tools Needed

    • None

    Steps

    1. Get in Position
      Sit on the floor facing your baby. They can be on their tummy, sitting up, or supported in a seated position depending on their age.
    2. Introduce the Ball
      Let your baby see and touch the ball. Roll it gently toward them and encourage them to reach, touch or push it back.
    3. Use Expressions and Sounds
      Make fun noises (“wheee!”) or use your facial expressions to build connection and engagement.
    4. Encourage Turn-Taking
      Take turns rolling the ball — even if your baby can’t roll it yet, they’ll enjoy the rhythm and repetition.
    5. Celebrate Effort
      Clap, smile, or cheer whenever they interact with the ball to build confidence and joy.

    Variations

    • Texture Balls: Use balls with different textures or gentle rattles for added sensory interest.
    • Obstacle Roll: Place soft cushions or toys in the path for older babies to roll around or over.
    • Mirror Play: Roll the ball in front of a mirror so your baby can see their own reactions.
    • Rolling Tunnel: Roll the ball through a short tunnel made of a blanket or cardboard box for extra excitement.

    Safety Tips

    • Always supervise closely during play, especially with babies who are still developing head and body control.
    • Use only soft, baby-safe balls that are lightweight and large enough not to be a choking hazard.
    • Play on a soft mat or carpeted area to help prevent slips or bumps.