Parental Involvement: Medium

  • Pebble Towers

    Pebble Towers

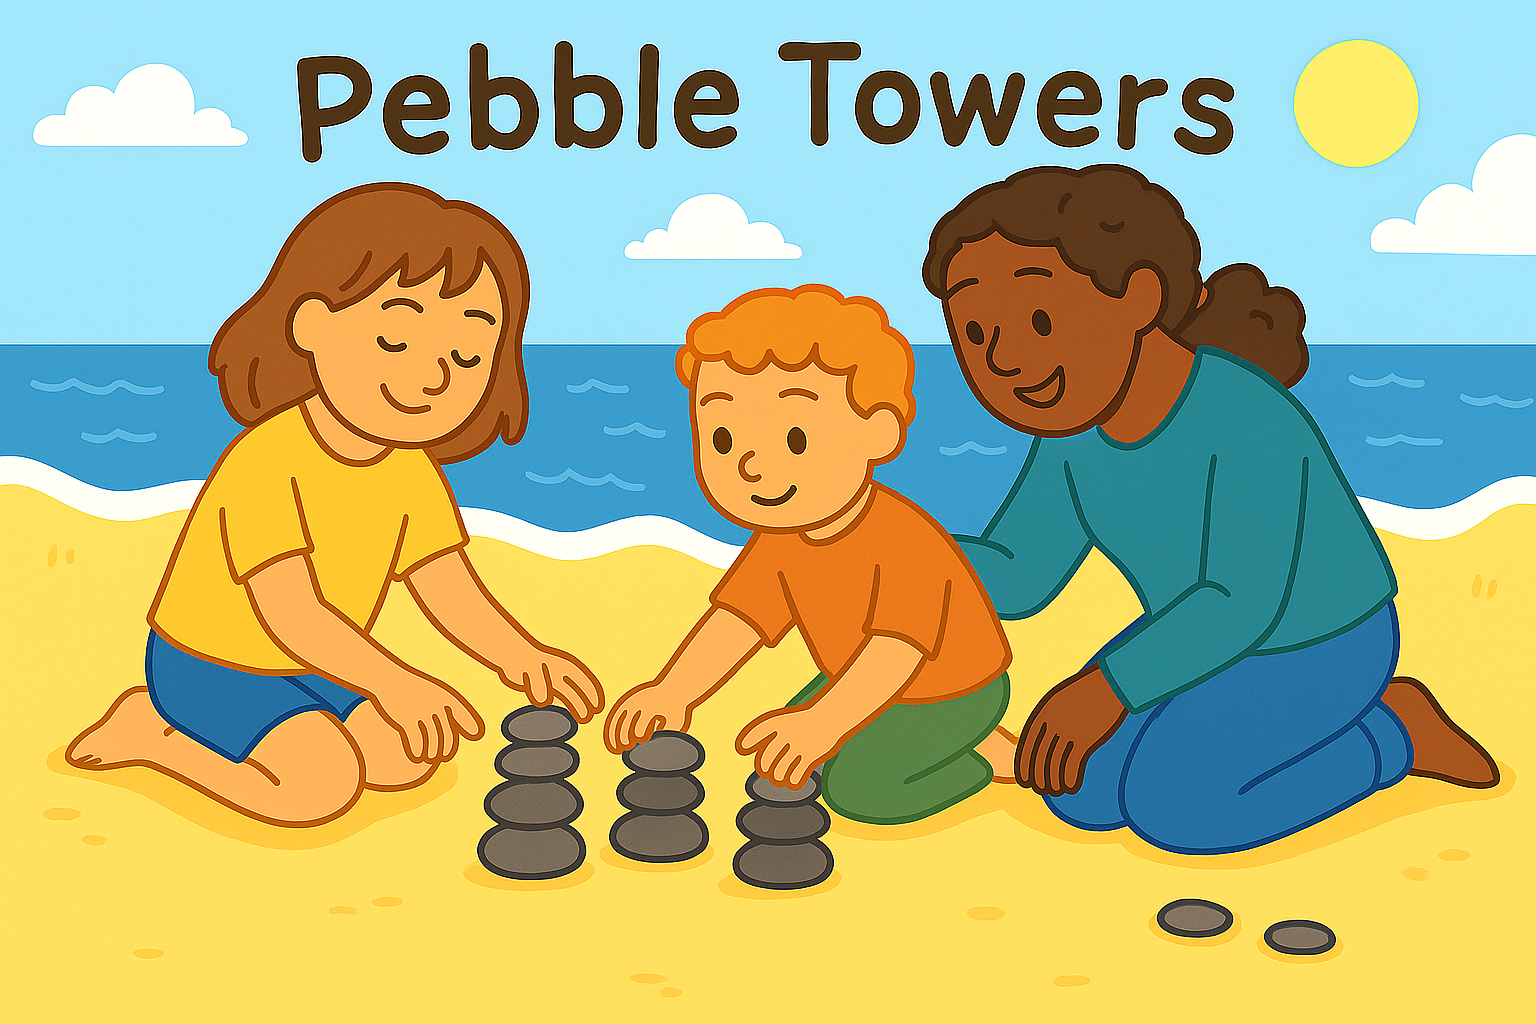
    Build and test small towers from smooth pebbles. It’s a calm, hands-on way to explore balance, weight, and shape while sharing easy wins together.


    Materials

    • Smooth pebbles or stones (mix of sizes)
    • Tray, board, or firm patch of ground
    • Small ruler or tape measure
    • Chalk or marker (to note tallest height)
    • Cloth or towel for drying hands
    • Bucket (optional, for carrying pebbles)

    Tools

    • None required

    Steps

    1. Set the stage: Choose a flat, steady surface indoors or out. Lay out the pebbles and keep a ruler handy.
    2. Sort & notice: Group pebbles by size and shape. Spot the flattest ones for sturdy bases.
    3. Build the base: Start with 2–3 broad pebbles. Press gently to check they don’t wobble.
    4. Stack with care: Add one pebble at a time. Aim for “three-point contact” (three tiny touch points) to help balance.
    5. Test & tweak: Give the tower a light tap. If it wobbles, rotate a pebble or swap it for a flatter one.
    6. Measure the win: When it stands for 5 seconds, measure the height and mark it with chalk.
    7. Try a twist: Build two towers the same height, make a small arch (two towers with a flat “bridge” on top), or build on damp sand for extra challenge.
    8. Tidy & return: Photograph your tallest tower, then put pebbles back neatly where they came from.

    Variations

    • Minute Tower: How tall can a tower get in 60 seconds without falling?
    • Pattern Stack: Alternate light–dark pebbles or big–small for a simple pattern.
    • Twin Build: Two builders work side by side and must finish at the same height.
    • Wind Test: Use a handheld fan or gentle breath to see which design survives a light “breeze”.

    Why It’s Great

    • Fine motor control – Careful placing builds hand strength and precision.
    • Early engineering – Simple, concrete lessons in weight, friction, and centre of gravity.
    • Focus & patience – Quiet, repeatable challenges that feel satisfying.
    • Nature connection – Noticing textures, colours, and shapes outdoors.
    • Together time – Easy to do side by side with gentle coaching.

    Safety Tips

    • Choose pebbles larger than a £2 coin for under-5s; supervise closely and keep stones away from mouths.
    • Avoid heavy rocks on toes and fingers; build at ground level.
    • Wash hands after handling natural materials; dry hands before stacking on a water tray.
    • Collect responsibly—don’t remove stones from protected beaches or habitats; return items where found.
    • No throwing stones; set a calm, seated build zone.
  • Weather in a Jar

    Weather in a Jar

    This weather-themed experiment is a fun way to show how clouds hold and release rain.

    By creating a “cloud” of shaving foam in a clear jar filled with water, children can drip coloured water on top and watch it slowly fall through like rain.

    It’s a gentle, hands-on introduction to weather science — with a splash of colour and a touch of magic.


    Materials

    • Clear jar or glass
    • Shaving cream (foam type)
    • Water
    • Food colouring (blue works well, or mix your own)
    • Small bowl or cup for colouring

    Tools

    • Pipette, dropper, or teaspoon
    • Towel or tray to catch drips

    Steps

    1. Fill a clear jar about ¾ full with water.
    2. Add a layer of shaving cream on top to represent the cloud.
    3. In a small cup, mix food colouring with water.
    4. Use a dropper or spoon to gently add coloured water to the shaving cream.
    5. Watch as the colour slowly falls through the “cloud” into the water below — like rain from the sky!

    Variations

    • Stormy Skies: Use dark blue, grey, or purple colourings to simulate different weather moods.
    • Rainbow Rain: Try several colours at once for a bright effect.
    • Observation Challenge: Ask children to guess how many drops the cloud can hold before it starts to rain.

    Why It’s Great

    • Explains Weather Concepts – Visualises how clouds fill and release rain.
    • Encourages Observation – Kids can watch changes and describe what they see.
    • Messy but Manageable – Involves water and foam but stays mostly contained in a jar.

    Safety Tips

    • Supervise children when using food colouring to avoid staining surfaces or skin.
    • Ensure young children know not to touch or taste the foam or coloured water.
  • Sign Up for Swimming Lessons

    Sign Up for Swimming Lessons

    Learning to swim is a vital life skill — and one of the most enjoyable too!

    Signing up for swimming lessons gives children a chance to gain confidence in the water, improve coordination, and have lots of splashy fun with others.

    Classes are often grouped by age or ability, starting with water play and basic strokes, then progressing to floats, breathing techniques and deeper-water skills. It’s also a brilliant way to get regular exercise that’s gentle on growing bodies.


    Why It’s Great

    • Water Safety – Teaches children how to stay safe and feel confident in and around water.
    • Fitness & Strength – Boosts cardiovascular health, muscle tone and stamina.
    • Confidence & Independence – Children learn to manage risks and master new skills with support.
    • Fun & Social – Group sessions help build friendships and teamwork through games and practice.

    How to Get Started

    • Contact your local leisure centre or swimming pool — most offer group lessons for children aged 3+.
    • Check whether the lessons are accredited by Swim England or a similar body.
    • Many pools offer trial sessions before you sign up for a block of lessons.
    • Swimwear, goggles and a towel are usually all that’s needed — floatation aids are provided if required.

    Variations

    • Parent & Toddler Swim: Water play and bonding time for babies and toddlers with their grown-ups.
    • Intensive Holiday Courses: Daily lessons over school holidays for faster progression.
    • Swim Clubs: Once confident, children can move into fun swim clubs or beginner-level competitions.

    Safety Tips

    • Only sign up with qualified instructors and facilities with proper supervision.
    • Make sure children understand pool rules and are always within view of a lifeguard or adult.
    • Don’t rush progress — every child develops water confidence at their own pace.
  • Rock Painting

    Rock Painting

    Rock painting is a simple but endlessly creative craft that kids (and grown-ups) love.

    Smooth stones become tiny canvases for colourful designs, animals, patterns, or messages. You can display them at home, gift them to friends, or even hide them in the park for others to find—a lovely way to spread a little happiness.

    It’s also a great activity to dip in and out of, making it perfect for a relaxed afternoon at home or a calm creative project during school holidays.


    Materials Needed

    • Smooth, clean rocks (collected or bought)
    • Acrylic paints or paint pens
    • Paintbrushes (small ones for details)
    • Water pot and kitchen roll for cleaning brushes
    • Optional: sealer or varnish to protect finished designs

    Tools Needed

    • Old newspaper or a wipe-clean mat to protect surfaces
    • Aprons or old clothes for messier artists

    Steps

    1. Prepare the Rocks
      Wash and dry the stones to remove dirt and dust before painting.
    2. Get Creative
      Paint your designs—animals, patterns, letters, or anything your child imagines. Let each layer dry before adding details.
    3. Let Dry Fully
      Leave the rocks to dry completely before handling.
    4. Seal (Optional)
      Apply a clear sealer to protect the artwork, especially if the rocks will go outside.
    5. Display or Hide
      Decorate the garden, keep them as keepsakes, gift to friends, or hide for others to find.

    Variations

    • Kindness Rocks: Paint positive words or messages to brighten someone’s day.
    • Story Stones: Paint pictures and use them as prompts for storytelling together.
    • Glow-in-the-Dark: Use glow-in-the-dark paints for a magical night-time garden display.
    • Nature Patterns: Try leaves, flowers, or bug designs inspired by your outdoor walks.

    Safety Tips

    • Always supervise young children when using paints and small items.
    • Use child-safe, non-toxic paints suitable for age and environment.
    • Make sure rocks are smooth—avoid sharp edges that could cause scratches or cuts.
    • Ensure good ventilation if using sealant or varnish, and follow product instructions carefully.
  • Learn a Musical Instrument

    Learn a Musical Instrument

    Learning a musical instrument is a fantastic way for children to express themselves, develop discipline, and build confidence.

    Whether it’s a recorder, keyboard, ukulele or violin, there are options for all ages and budgets — and many instruments can be explored in fun, informal ways before committing to formal lessons.

    Children often start with short, playful sessions and grow their skills over time. Practising regularly at home can become part of the weekly routine, and many schools or community centres offer affordable group or individual lessons.


    Why It’s Great

    • Creativity & Expression – Encourages musical play and personal interpretation.
    • Focus & Patience – Helps children develop concentration and persistence over time.
    • Fine Motor Skills – Supports coordination, dexterity and timing.
    • Confidence Boost – Performing or sharing music builds self-esteem and pride in progress.

    How to Get Started

    • Try beginner-friendly instruments like keyboard, recorder, ukulele or percussion to start.
    • Look for local music tutors, school-run music clubs, or online group classes for children.
    • Some music shops offer rental schemes or second-hand options for trying an instrument affordably.
    • Start with short sessions — even 10–15 minutes of fun practice can make a big difference.

    We loved using the Simply Piano app; it’s not technically “offline” or “screen-free” but a really fun way to learn piano.


    Variations

    • Group Lessons: Often more social, fun and cost-effective for beginners.
    • Play-Along Apps: Many free and paid apps support practice through games and interactive songs.
    • Informal Jamming: Encourage children to explore sound freely before starting lessons.

    Safety Tips

    • Use child-sized instruments where possible to avoid strain or discomfort.
    • Encourage regular breaks during practice to prevent fatigue or tension.
    • For beginners, focus on enjoyment over perfection — a relaxed start fosters long-term engagement.
  • Sand Volcanoes

    Sand Volcanoes

    Sand Volcanoes are a brilliant way to mix building fun with a bit of science-inspired imagination.

    Kids can shape their own volcano using damp beach sand, forming a cone with a crater at the top — just like the real thing. Pouring water into the crater mimics a lava flow, adding excitement and sensory play to the experience.

    This activity is perfect for beach play and invites children to experiment with shaping, stability and storytelling all at once.


    Materials

    • Damp sand
    • Bucket or container of water

    Tools

    • Hands or small spades (optional)

    Steps

    1. Choose a patch of damp sand and begin shaping it into a mound or cone.
    2. Use hands or a small shovel to carve out a crater at the top — this will be your volcano’s mouth.
    3. Carefully pour a little water into the crater and watch it flow down the sides like lava.
    4. Experiment with adding more water or reshaping the volcano to see how the flow changes.
    5. Optional: Decorate your volcano with seaweed or shells for added flair!

    Variations

    • Baking Soda Eruption: Add a small plastic cup in the crater and fill with baking soda and vinegar for a foamy reaction (bring ingredients from home).
    • Mini Volcano Village: Build a town or landscape around your volcano and tell a story.
    • Coloured Lava: Mix a drop of food colouring into the water to enhance the “lava” look.

    Why It’s Great

    • Combines STEM and Creativity – Explore shape, erosion and flow while building a story around it.
    • Great for Team Play – Fun to build and experiment with as a pair or group.
    • Open-Ended Fun – Kids can adapt the volcano and landscape however they like.

    Safety Tips

    • Supervise children near water and encourage pouring water away from others.
    • If using baking soda and vinegar, keep the mix well-contained and avoid contact with eyes.
    • Ensure the volcano area is clear of sharp shells or hidden rocks.
  • Indoor Bowling

    Indoor Bowling

    Indoor bowling is a brilliant way to keep kids active and entertained—especially on days when going out isn’t an option.

    With just a few empty bottles and a soft ball, you can transform a hallway or lounge into a mini bowling alley. It’s great for hand-eye coordination, motor skills, turn-taking, and a healthy dose of cheering each other on.

    There’s no need for special equipment, and it can be scaled up or down depending on the space you’ve got. Plus, it’s the kind of game that keeps little ones coming back for “just one more go”.


    Materials Needed

    • 6–10 empty plastic bottles or soft toy pins
    • Soft ball (e.g. foam, rolled-up socks, or small plush ball)
    • Optional: masking tape to mark lanes or starting lines
    • Paper and pencil for scoring (optional)

    Tools Needed

    • None

    Steps

    1. Set Up the Pins
      Arrange your bottles in a triangle formation at one end of a hallway or open space.
    2. Mark a Start Line
      Use masking tape or a cushion to show where to bowl from.
    3. Take Turns
      Each player rolls or gently throws the ball to try to knock over as many pins as they can.
    4. Keep Score (Optional)
      Score one point per pin, or just play for fun and see who gets a strike!
    5. Reset and Repeat
      Set the pins back up after each round. Take turns or play in teams.

    Variations

    • Glow Bowling: Add glow sticks inside bottles and dim the lights for a night-time version.
    • Themed Pins: Decorate bottles as monsters, animals, or favourite characters.
    • Obstacle Challenge: Add soft objects in the “lane” to roll around or bounce off.
    • Target Practice: Use fewer pins and challenge kids to hit specific ones for extra points.
  • Attend an Art Club or Workshop

    Attend an Art Club or Workshop

    Art clubs and workshops are brilliant spaces for children to explore their creativity in a relaxed and social setting.

    Whether it’s after school or at the weekend, these sessions often focus on fun, process-led activities like painting, drawing, printing or sculpture — with no pressure for things to look a certain way.

    Children benefit from learning new techniques, using a wide range of materials, and gaining confidence in their ideas and abilities. Many clubs are themed or seasonal, and some may include visiting artists or local exhibitions to inspire young makers.


    Why It’s Great

    • Creative Expression – Encourages imagination and self-confidence through open-ended art activities.
    • Fine Motor Skills – Strengthens hand–eye coordination and tool use.
    • Mindful Focus – Offers calm, screen-free time to relax and engage fully with the task.
    • Social & Inclusive – Welcomes all abilities and allows children to share ideas and explore together.

    How to Get Started

    • Search for local children’s art clubs, community workshops or events at galleries or libraries.
    • Check whether the club provides materials or if children need to bring their own.
    • Look for inclusive, process-based classes where exploration is the focus rather than finished products.
    • Dress for mess — old clothes or an apron are ideal.

    Variations

    • One-Off Workshops: Great for trying something new like clay modelling, printmaking or collage.
    • Themed Clubs: Some sessions explore nature, storytelling or even art history through hands-on making.
    • Family Art Sessions: Some clubs offer weekend or holiday sessions where parents and carers can join in too.

    Safety Tips

    • Ensure the space is well-ventilated and age-appropriate materials are used.
    • Staff should be DBS-checked and provide supervision throughout.
    • Non-toxic paints and materials should be used, especially for younger children.
  • Chinnies

    Chinnies

    “Chinnies” (or upside down chin people) is a wonderfully silly activity where children draw a face on their chin, turn their head upside down, and use a phone or mirror to bring their new character to life. It’s simple, light-hearted, and guaranteed to spark laughter—perfect for rainy afternoons or moments when everyone needs a quick mood boost.

    All you need is a mirror or phone camera, a safe face pen, and a bit of creativity. You might be surprised how expressive a chin can be!


    Materials Needed

    • Washable face paint pen or eyeliner pencil (avoid permanent markers)
    • Mirror or phone with front-facing camera
    • Towel or scarf (to cover the rest of the face)

    Tools Needed

    • None

    Steps

    1. Prep the Chin
      Wash and dry the area around the chin. Use a mirror if your child wants to help draw.
    2. Draw a Face
      Draw eyes on the chin, or stick eyes on. You can also add other flourishes like a moustache or hair.
    3. Cover the Face
      Use a towel, scarf, or t-shirt to cover the upper face and hair—just leave the chin exposed.
    4. Flip the Camera
      Use a front-facing phone camera or mirror so the chin person appears the right way up.
    5. Perform!
      Give your chin character a name, a silly voice, and maybe even act out a short skit or song. The more teeth, tongue, and crazy mouth movements the better!

    Variations

    • Video Messages: Record a silly greeting from your chin person to send to family or friends.
    • Double Act: Make two chinnies and film a conversation or talent show between them.
    • Crafty Costumes: Add paper hats or mini props taped to the chin for extra character.
    • Character Challenge: Draw different expressions—grumpy, excited, surprised—and guess what each one is.
  • Join a Choir or Singing Group

    Join a Choir or Singing Group

    Whether it’s a school choir, community group or church ensemble, singing in a group is a fantastic way for children to explore music, work as a team, and gain confidence. Kids of all abilities are welcome — there’s no need to read music or have solo experience to join in.

    Sessions usually include warm-ups, vocal games, learning songs together, and sometimes preparing for performances. Singing together also helps develop listening skills, emotional expression and a strong sense of connection with others.


    Why It’s Great

    • Musical Development – Builds pitch, rhythm, memory and ear training in a natural, engaging way.
    • Confidence & Joy – Performing as part of a group can feel empowering and uplifting.
    • Teamwork – Teaches collaboration, timing, and listening to others.
    • Emotional Expression – Singing is a creative outlet that can boost wellbeing and mood.

    How to Get Started

    • Look for local children’s choirs or singing groups at schools, churches, or music centres.
    • Most groups welcome new members of all ability levels, especially in younger age ranges.
    • Trial sessions or “come and sing” events are often available to see if it’s a good fit.
    • No special equipment needed — just bring a water bottle and enthusiasm!

    Variations

    • Pop Choirs: More relaxed, modern styles with upbeat tunes and simple harmonies.
    • Traditional or Classical Choirs: Focus on vocal training, sacred music or traditional arrangements.
    • Show Choirs: Combine singing with light choreography for an energetic group experience.

    Safety Tips

    • Make sure sessions are run by qualified, DBS-checked leaders in a safe environment.
    • Children should feel encouraged and supported, not judged — especially in early sessions.
    • Voice strain can be avoided with proper warm-ups and age-appropriate vocal ranges.
  • Make a Mud Pie

    Make a Mud Pie

    Making mud pies is one of those beautifully simple activities that invites children to get stuck in, use their imagination, and connect with the outdoors.

    There’s no right or wrong way to do it—just scooping, stirring, decorating, and a whole lot of joyful mess.

    It’s a great opportunity for sensory play and imaginative role-play, whether your child is running a pretend bakery or creating magical nature potions.

    Best of all, it uses materials that are easy to find and encourages children to explore the textures and patterns of the natural world.


    Materials Needed

    • Soil or mud (a damp patch of garden or potting soil in a tray)
    • Water
    • Old bowls, pots, spoons or kitchen utensils
    • Leaves, flower petals, sticks, stones for decoration

    Tools Needed

    • Watering can, jug, or small bucket
    • Trowel or large spoon (optional)

    Steps

    1. Choose a Mud Pie Spot
      Set up in the garden, a corner of the park, or even on a waterproof mat with a tray of soil if you don’t have outdoor space.
    2. Mix It Up
      Add water to the soil to create lovely, squishy mud. Let children feel the texture and adjust the mix themselves.
    3. Shape and Decorate
      Use old bowls or pots as “pie tins” and decorate with leaves, petals, or pebbles.
    4. Serve and Pretend
      Encourage pretend café play, magic spells, or nature-themed creations—wherever their imagination takes them.
    5. Let It Be
      There’s no need for a perfect pie. It’s all about the process, not the result.

    Variations

    • Nature Bakery: Create a menu of mud cupcakes, pebble biscuits, and leaf lasagne.
    • Birthday Mud Cake: Add stick “candles” and sing happy birthday to a favourite toy.
    • Outdoor Café: Set up a pretend café with a name, menu, and “customers” (toys or carers).
    • Potion Play: Add petals, herbs or coloured water and turn it into a potion-making lab.

    Safety Tips

    • Always supervise young children during messy play, especially around water and natural materials.
    • Make sure hands are washed thoroughly afterwards—especially before eating.
    • Use clean soil and avoid muddy areas where pets or wildlife may have been.
    • Encourage children not to touch their face or mouth during the activity.

  • Pub Cricket

    Pub Cricket

    Submitted by Ross W. Submit your own activity here.

    This travel game is a source of many an argument – just as real cricket can be.

    It works best as you travel through rural areas in the UK and Ireland (maybe other places).

    The basic rules are:

    • You take it in turns to be “in”
    • If you are “in” and you see a pub sign that has legs on it, you score a “run” for each leg. So if you see “The King George” you get 2 runs. If you see “The Horse and Hounds”… well. (We make plurals equivalent to 2, so a “Horse and Hounds” would be 12 runs)
    • If you are in and you or someone else sees a pub sign with no legs on, you are out and the next person goes in.

    You will need to decide the precise nature of how the game works. Arguing about the rules is part of the “fun”.

    For example:

    • Do pubs without signs count? Or is it only signs?
    • Do you only count the legs shown on the sign?
    • Do you have to actually see the pub in question? Or is “The Unicorn -> 200yds” acceptable?
    • How do you score “Arms”? Is “The King’s Arms” zero runs and out because it’s a coat of arms? Or does the presence of the King count?
    • What even IS a pub? Do hotels count?

    The winner is obviously the person with the most runs at the end of the journey. Or when you’re all very annoyed with each other and decide to stop playing.

    A photo of a pub called "Shepherd & Flock"
    How many ‘points ‘runs’ would this pub score?

  • Take a Dance Class

    Take a Dance Class

    Dance classes offer a wonderful mix of rhythm, creativity and physical activity.

    Whether children are into high-energy styles like hip hop or prefer the structure of ballet or tap, there’s a dance class to suit every personality and ability level.

    Classes usually begin with a warm-up and stretch, followed by age-appropriate routines, games and choreography. Children gain confidence as they learn new moves and may even take part in performances or showcases, depending on the class.


    Why It’s Great

    • Physical Activity – Builds strength, flexibility, coordination and stamina.
    • Confidence & Self-Expression – Encourages creativity and positive self-image through movement.
    • Discipline & Listening – Teaches rhythm, timing, and following directions as part of a group.
    • Community & Fun – Children enjoy socialising and moving together in a structured but joyful environment.

    How to Get Started

    • Search online for children’s dance classes near you — look for styles like ballet, street, tap, or creative movement.
    • Check local leisure centres, community halls, and performing arts schools.
    • Many clubs offer a trial class or beginner course to get started.
    • Children usually wear a dance outfit or comfy clothes with non-slip shoes — uniforms may be introduced later.

    Variations

    • Creative Movement: For toddlers and preschoolers — focus is on playful movement and body awareness.
    • Performance Groups: Older children might take part in recitals, shows or competitions.
    • Inclusive Classes: Some studios offer SEN-friendly dance classes with adapted routines and sensory-friendly spaces.

    Safety Tips

    • Ensure classes are taught by qualified instructors in a safe, supervised environment.
    • Proper warm-up and cool-down routines help reduce injury risks.
    • Dance floors should be slip-resistant and appropriate for the style being taught.
  • Post Office

    Post Office

    Playing Post Office is a fantastic make-believe activity that also supports early literacy and communication skills. Children can write letters or drawings, stamp envelopes, and deliver them around the house using a toy satchel or basket.

    This activity encourages writing, role-play, turn-taking, and organisation—and it brings joy when the “post” arrives! It’s also a great way to sneak in handwriting practice or connect with family members through real or pretend letters.


    Materials Needed

    • Paper, envelopes, or folded cards
    • Stamps or stickers
    • Pens, pencils, crayons
    • Basket, bag, or toy satchel for deliveries

    Tools Needed

    • Scissors and glue (optional, for creating stamps or post box)

    Steps

    1. Set Up a Writing Station
      Provide paper, cards, crayons, and stickers for creating letters and parcels.
    2. Make Stamps
      Draw or cut out pretend stamps and stick them onto envelopes.
    3. Sort the Post
      Bundle letters together and assign them to different “houses” (rooms or people).
    4. Deliver the Mail
      Load up a postbag and make deliveries throughout the house—knocking, posting, and announcing the mail as you go!
    5. Swap Roles
      Take turns being the writer, sender, and postie.

    Variations

    • Post Box Craft: Make a post box from a cereal box or shoebox with a slot at the top.
    • Special Delivery: Add urgency—someone’s birthday card needs to arrive in time!
    • Real-Life Link: Write real letters to grandparents, friends, or neighbours and post them for real.
    • Parcel Post: Wrap small toys in paper and “deliver” packages with care instructions.
  • Join a Gymnastics Class

    Join a Gymnastics Class

    Gymnastics classes offer children a brilliant mix of fun, focus and physical activity.

    Whether it’s learning to cartwheel or simply practising balance and coordination, these sessions are packed with movement that supports healthy growth and development.

    Classes are typically structured to suit different ages and abilities, making it a great ongoing activity that builds confidence over time. Kids also benefit from group routines, partner work and gentle challenges that promote resilience and teamwork.


    Why It’s Great

    • Physical Development – Improves flexibility, coordination, balance and core strength.
    • Confidence Building – Accomplishing new skills boosts self-esteem and motivation.
    • Fun and Social – Encourages friendships and group play in a supportive environment.
    • Body Awareness – Teaches safe movement, spatial awareness and body control.

    How to Get Started

    • Search online for “children’s gymnastics classes near me” or check with your local leisure centre or community hall.
    • Look for British Gymnastics–accredited clubs, which ensure safety and age-appropriate coaching.
    • Trial sessions are often available so children can try before committing.
    • Wear comfy clothes or check with the club about a uniform after a few weeks.

    Variations

    • Parent & Toddler Gym: Many clubs offer soft-play style gym sessions for under 5s to explore safely.
    • Display Teams: Older or more advanced kids may get involved in choreographed routines for local shows or festivals.
    • Trampoline Clubs: For those who love bouncing, some gyms also offer recreational trampoline sessions.

    Safety Tips

    • Ensure the club is affiliated with a recognised body (like British Gymnastics) and instructors are qualified and insured.
    • Children should warm up properly and follow all safety rules shared by the coaches.
    • Keep water bottles handy and take regular rest breaks, especially in warm venues.
  • Play Café

    Play Café

    Setting up a restaurant or café is a classic pretend play activity that brings together creativity, communication, and just the right amount of chaos. Children can take on roles as chef, waiter, customer—or all three—and enjoy making menus, serving dishes, and handling orders.

    Whether using play food or real (safe) snacks, this activity encourages social interaction, early maths and literacy skills, and builds confidence through imaginative play. It’s also great fun for siblings or playdates.


    Materials Needed

    • Play food or safe real snacks (e.g. fruit, crackers, dry cereal)
    • Toy or real crockery and cutlery
    • Paper and pens for menus or order pads
    • Optional: apron, tray, tablecloth

    Tools Needed

    • None (unless including real food preparation with adult help)

    Steps

    1. Set Up the Dining Area
      Lay a table using real or toy dishes. Add decorations like a tablecloth, napkins, or flowers.
    2. Create a Menu
      Let children draw or write a menu with pictures and prices for their dishes.
    3. Assign Roles
      One child can be the waiter or chef, while others take turns as guests.
    4. Take Orders and Serve
      Guests “order” from the menu, and the chef prepares and delivers the meals.
    5. Swap Roles
      Switch roles so everyone gets a chance to be customer and server.

    Variations

    • Drive-Thru or Takeaway: Set up a counter and take food orders through a pretend window or phone.
    • Bake and Serve: Prepare simple snacks like toast, fruit salad, or rice cakes as part of the café experience (with adult help).
    • Write Receipts: Add a maths twist by having children total the order and write out receipts.
    • Themed Restaurant: Try an ice cream parlour, pizza place, or fancy bistro with costumes and background music.
  • Charades

    Charades

    Charades is a classic guessing game that’s full of fun and totally flexible. It’s ideal for families, small groups, or even one-on-one time with your child. All it takes is a few ideas—movies, animals, actions—and a willingness to be a bit silly.

    This game encourages creativity, communication, and body awareness while giving everyone a chance to shine. It works brilliantly indoors on rainy days, and you can easily adapt it to suit different ages and abilities.


    What You Need

    • Small slips of paper
    • Pens or pencils
    • A bowl or hat
    • A timer (optional)

    Setup

    • Write down different actions, phrases, characters, or objects on slips of paper. These can be themed (e.g. movies, animals, jobs) or completely random.
    • Fold the slips and place them into a bowl or hat.
    • Divide into two teams.

    Steps

    1. Choose one player from the first team to act out the word or phrase without speaking or making any sounds.
    2. Start the timer (e.g. 1–2 minutes).
    3. The rest of their team tries to guess the word or phrase before the timer runs out.
    4. If they guess correctly, their team scores a point.
    5. Teams take turns, with a new actor each round.
    6. Play continues for a set number of rounds or until all slips have been used.

    Standard Gestures

    • Number of words: Hold up fingers to show how many words are in the phrase (e.g. two fingers for “two words”).
    • Number of syllables: Tap your forearm with the number of syllables in the word using your fingers.
    • Which word: Hold up the number of fingers to indicate which word you’re acting out (e.g. three fingers for the third word).
    • Sounds like: Cup your hand behind your ear.
    • Short word (like “a” or “the”): Use your thumb and index finger to show something tiny.
    • Movie: Pretend to crank an old-fashioned movie camera.
    • Book: Open your hands as if opening a book.
    • TV show: Trace a rectangle in the air (like a screen).
    • Song: Pretend to sing or tap an imaginary microphone.

    Variations

    Reverse charades: The whole team acts while one person guesses.

    Solo play: One person acts for everyone else playing together.

    Themed rounds: Choose a specific category like “Animals”, “Disney Characters” or “Everyday Tasks”.

  • Superheroes & Villains

    Superheroes & Villains


    Save the Day with Imaginative Play!

    Superhero play gives children a brilliant outlet for big imagination, big energy, and big ideas.

    Whether they’re flying around the garden with capes, rescuing stuffed animals from imaginary danger, or teaming up to defeat a household “villain”, this kind of play builds confidence and cooperation.

    Kids can take on familiar roles like Spider-Man or Wonder Woman, or invent completely new characters with unique powers, costumes, and missions. It’s a fantastic way to explore themes like bravery, helping others, and creative problem-solving—all through play.


    Materials Needed

    • Blankets, tea towels or fabric scraps for capes
    • Paper, card, or masks (store-bought or homemade)
    • Toys to “rescue” or “protect”

    Tools Needed

    • Scissors and crayons (for designing masks or badges)
    • Optional: string, glue, or tape for costume crafting

    Steps

    1. Create a Hero Identity
      Let children choose their superhero name, powers, costume and mission.
    2. Make a Costume
      Use capes, masks, or badges to bring their characters to life. Keep it simple and safe.
    3. Invent a Villain
      Make up a harmless “bad guy” or problem that needs solving—e.g. rescuing a toy from the sofa volcano!
    4. Start the Adventure
      Act out missions, team up with other heroes, and save the day.
    5. Reflect and Celebrate
      Talk about what the heroes achieved. What made them brave? How did they work together?

    Variations

    • Hero Training Camp: Set up obstacle courses or challenges to test each hero’s skills.
    • Villain Role-Swap: Let kids play the villain for a round and flip the story!
    • Super Pet Sidekick: Add soft toy companions to help with missions.
    • Storybook Session: Write or draw comic-style stories based on their hero adventures.
  • Fly a Kite

    Fly a Kite

    Flying a kite is a joyful, low-cost way to enjoy the outdoors together. It encourages movement, coordination, and a sense of calm focus while watching the kite dance across the sky.


    Materials

    • Kite
    • Flying line with handle/winder
    • Tail ribbon or spare streamers (for balance)
    • Optional: small ground peg or stake to secure the line
    • Optional: lightweight gloves to prevent string burn
    • Optional: tape or elastic bands for quick fixes

    Tools

    • No extra tools needed beyond the items above

    Steps

    1. Pick a wide, open space away from trees, roads, power lines, water, and busy paths.
    2. Check for a light to moderate breeze (leaves rustling, jacket flapping). If it’s very gusty, wait for calmer conditions.
    3. Attach or check the tail. Unwind a few metres of line and face the wind.
    4. Two-person launch: The adult (or helper) holds the kite above head height. On a count of three, they release as the flyer gently walks backwards and lets the line out steadily.
    5. Solo launch: Hold the kite at shoulder height, release into the wind, and take a few brisk steps forward as you let the line out.
    6. Keep the kite steady with small, gentle tugs on the line. Let more line out as it climbs; reel in a little if it starts to wobble.
    7. Try simple challenges: keep it level for 20 seconds, draw a giant sky “circle,” or count how long it stays up.
    8. To land, walk forwards towards the kite while slowly winding the line in, guiding it down softly.
    9. Wrap the line neatly and check for knots before packing away.

    Why It’s Great

    • Movement – Encourages running, balance, and coordination.
    • Focus – Calming, mindful attention on the kite and the wind.
    • Teamwork – Launching and flying together builds cooperation.
    • Problem-solving – Adjusting line and tail to keep the kite steady.
    • Fresh air – Simple outdoor time that feels special.

    Safety Tips

    • Choose a clear, open area away from trees, power lines, roads, railways, and water.
    • Do not fly in storms, rain, or very strong winds. Avoid flying near crowded paths or wildlife nesting areas.
    • Keep a safe distance from others; use lightweight gloves to prevent string burn.
    • Adults should supervise younger children and manage the line when it’s windy.
  • Ride a Bike

    Ride a Bike

    Riding a bike is one of childhood’s great milestones—and one of the simplest ways to enjoy fresh air, exercise, and freedom. From balance bikes for toddlers to longer rides for older kids, cycling is a brilliant outdoor activity that grows with your child.

    It builds motor skills, strengthens muscles, boosts confidence, and fosters independence. Whether you’re riding around the block, at the park, or on a trail, it’s also a fantastic way to bond as a family.


    Materials Needed

    • Bike (balance bike, trike, or pedal bike)
    • Helmet
    • Optional: knee/elbow pads, water bottle, high-vis vest

    Tools Needed

    • Bike pump and basic tools (for any quick adjustments)

    Steps

    1. Check the Bike
      Make sure tyres are inflated, brakes work, and the seat height suits your child.
    2. Put on Safety Gear
      Always wear a helmet and check straps are secure.
    3. Pick a Safe Area
      Choose a flat, open space like a park, path, or quiet street.
    4. Start Riding
      Support your child as they practise balance, steering, and braking—take it at their pace.
    5. Celebrate Progress
      Cheer them on! Whether they coasted for two seconds or completed a full lap, every bit counts.

    Variations

    • Obstacle Course: Set up cones or chalk lines to ride around.
    • Bike Parade: Decorate bikes with streamers or signs and go for a mini parade.
    • Destination Ride: Plan a short ride to a favourite spot—like a playground or café.
    • Off-Road Adventure: For older kids, try a forest trail or cycle path for a bit of challenge.