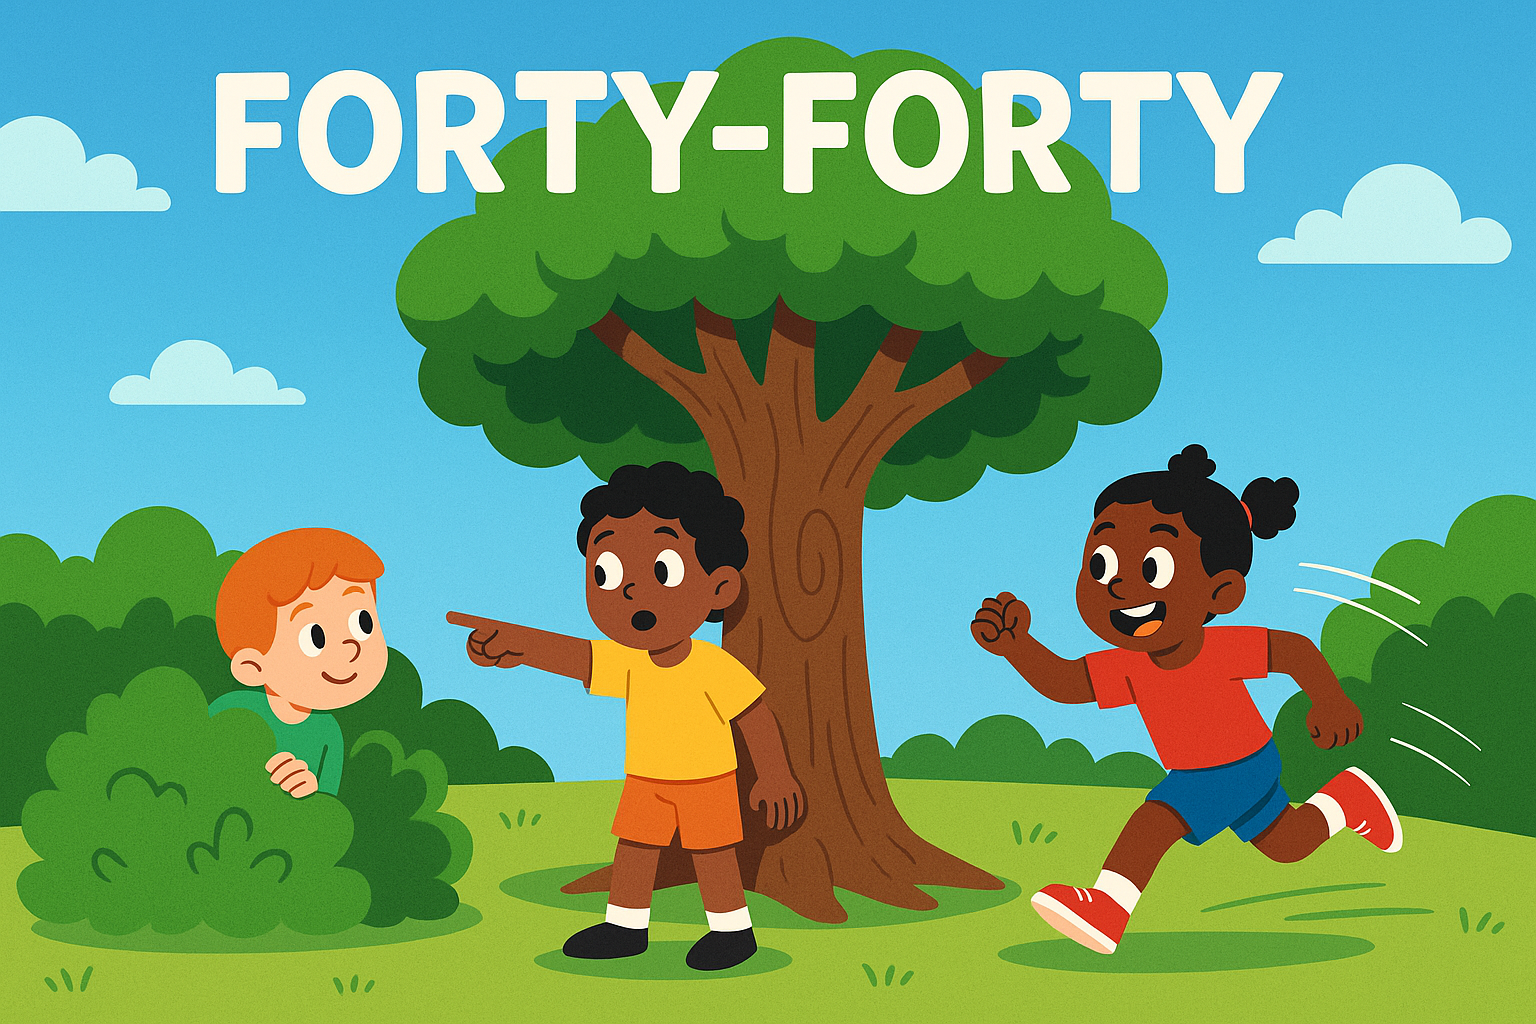
Parental Involvement: Low

  • Skimming Stones

    Skimming Stones

    Skimming stones is a peaceful, skill-building activity that’s stood the test of time.

    Whether by a calm sea, lake or river, children (and grown-ups!) love the simple challenge of finding the perfect stone and sending it dancing across the surface of the water.

    It encourages patience, observation and coordination — and it’s also a lovely way to enjoy a quiet moment outdoors.


    Materials

    • Flat, smooth stones (look for oval shapes about palm-sized or smaller)
    • A safe, calm stretch of water with open space and no people or animals nearby

    Tools

    • None

    Steps

    1. Search for flat, smooth stones with a good weight — not too light or too heavy.
    2. Stand with your feet planted and the water in front of you, with a clear stretch of space.
    3. Hold the stone between your thumb and fingers, tilt your wrist and flick it sideways across the water surface with a quick spin.
    4. Watch it bounce — and count the skips!
    5. Keep practising and try to beat your personal best.

    Variations

    • Distance Challenge: See how far a single skip can go.
    • Team Play: Compete with others for most skips or longest distance.
    • Stone Hunt: Have a contest to find the “perfect” skimming stone before you start.

    Why It’s Great

    • Supports Focus & Patience – A calming, repetitive activity that rewards practice.
    • Great for Coordination – Helps develop wrist control and timing.
    • Connects Kids with Nature – Encourages peaceful outdoor exploration.

    Safety Tips

    • Always ensure children throw in open water away from people, pets or wildlife.
    • Use only smooth stones to avoid cuts or scrapes.
    • Supervise younger children around water at all times.
  • Simon Says

    Simon Says

    Simon Says is a timeless action game that’s perfect for building focus, listening skills, and physical coordination — all while having a good giggle. One person gives instructions, like “Touch your toes!” or “Jump up and down!” but players should only follow them if they’re prefaced with the magic words: “Simon says…”

    If “Simon” doesn’t say it first and someone moves — they’re out for that round! It’s a brilliant way for children to practise self-control, quick thinking, and following directions in a playful, low-pressure setting.


    Materials Needed

    • None

    Tools Needed

    • None

    Steps

    1. Choose a Leader
      Pick one person to be “Simon”. This person gives the instructions.
    2. Start the Game
      “Simon” gives an action, such as “Simon says jump like a frog!”. Players do the action only if “Simon says” is used.
    3. Catch the Slip-Ups
      If “Simon” gives an action without saying “Simon says” and a player does it — they’re out for that round (or just do a silly forfeit if you prefer to keep everyone playing).
    4. Rotate Leaders
      Take turns being “Simon” so everyone gets a go at giving instructions.

    Variations

    • Themed Commands: Use only animal movements, superhero actions, or seasonal ideas like “Simon says blow like the wind”.
    • Musical Simon Says: Play background music and pause it every time a command is given.
    • Non-Verbal Simon: Try a version using actions only for older children who want a challenge!
    • Toddler-Friendly Version: Skip the “out” rule — just keep giving commands and enjoying the movement together.

    Safety Tips

    • Play in a clear space to avoid tripping or bumping into furniture.
    • Adapt movements based on children’s age and ability — avoid any actions that could cause strain or imbalance.
  • Beach Bowling

    Beach Bowling

    Beach Bowling is a brilliantly simple game that gets children moving, aiming, and laughing.

    All you need are a few plastic cups and a lightweight ball — perfect for beach days when you want something active but easy to set up.

    The sand helps slow the ball, which makes it great for little ones who are still developing coordination. It’s also soft and safe if things get a bit wobbly!


    Materials

    • Plastic cups (6–10 makes a good set of “pins”)
    • Beach ball or any lightweight ball

    Tools

    • None

    Steps

    1. Clear a flat patch of sand to set up your game.
    2. Arrange the plastic cups in a triangle like bowling pins.
    3. Decide on a throwing line — closer for little ones, further back for a challenge.
    4. Take turns rolling the beach ball towards the pins to knock them over.
    5. Reset and play as many rounds as you like!

    Variations

    • Scoring Game: Keep score over 5 or 10 rounds.
    • Obstacle Version: Add mounds or trenches in the sand for extra difficulty.
    • Team Play: Pair up and see which team gets the highest total.

    Why It’s Great

    • Encourages Active Play – Great for energy release and gross motor skills.
    • Easy to Set Up – Uses just a few items and works on most beaches.
    • Social Fun – Encourages teamwork, taking turns, and cheering each other on.

    Safety Tips

    • Supervise near water and ensure the play area is clear of sharp shells or rocks.
    • Use lightweight, soft materials to avoid injury.
    • Stay hydrated and use sun protection if playing on hot days.
  • Rock and Shell Hunt

    Rock and Shell Hunt

    Heading to the beach? A Rock and Shell Hunt is a brilliant way for children to engage with nature while enjoying a bit of quiet exploration.

    With a simple container or bucket, they can search for smooth pebbles, spiral shells, or even unusual finds like sea glass or rocks shaped like hearts.

    It’s a lovely activity for all ages, promoting attention to detail, creativity, and mindfulness. Many children enjoy collecting their finds to use in crafts later, or simply to display as a memory of the day.


    Materials

    • Bucket, bag or small container (optional)
    • Sunscreen and sunhat (if sunny)
    • Optional: magnifying glass for close inspection

    Tools

    • None

    Steps

    1. Head to a safe, accessible beach or shoreline with a mix of sand, pebbles, or rock pools.
    2. Encourage children to look for rocks or shells with interesting colours, patterns or textures.
    3. Set a fun challenge — can they find the roundest rock, the tiniest shell, or something shaped like a star?
    4. Collect gently and responsibly — leave living creatures and their habitats undisturbed.
    5. Once home, wash and sort any treasures to keep or use in crafts.

    Variations

    • Shape Hunt: Search for rocks or shells in specific shapes (hearts, spirals
  • Dots and Boxes

    Dots and Boxes

    Dots and Boxes is a quick, easy-to-learn game that helps children develop early strategy, patience, and turn-taking skills. All you need is a sheet of paper and two pens or pencils. Players take turns joining dots to build boxes — whoever completes a box gets to claim it. It’s simple, portable, and great for keeping little hands busy while waiting or relaxing at home.

    Even young children can quickly pick up the rules, while older kids enjoy developing tactics to outsmart their opponent and capture the most boxes.


    Materials Needed

    • Paper
    • Two pens or pencils (different colours if possible)

    Tools Needed

    • None

    Steps

    1. Draw the Grid
      Fill the page with a grid of evenly spaced dots (e.g. 5×5 or 6×6 dots).
    2. Take Turns Drawing Lines
      Players take turns drawing one horizontal or vertical line between two adjacent dots.
    3. Complete Boxes
      When a player completes the fourth side of a box, they mark it with their initial or colour to claim it, and get another turn.
    4. Keep Playing
      The game continues until all boxes are completed.
    5. Count Boxes
      When the grid is full, count how many boxes each player has claimed to see who wins.

    Variations

    • Different Grid Sizes: Use bigger or smaller grids depending on how long you want to play.
    • Team Play: Work in pairs for a friendly family competition.
    • Decorate Your Boxes: Instead of initials, let children draw a mini picture inside each box they win.
    • Time Challenge: Set a timer for each turn to keep the game moving quickly.
  • Journalling

    Journalling

    Journalling gives children a quiet, private space to reflect on their day, write down their thoughts, and explore their feelings.

    Whether it’s simple drawings, a few sentences, or a longer story, journalling helps children build emotional awareness, writing confidence, and a sense of routine.

    There’s no right or wrong way to do it — some children enjoy writing every day, while others may dip in whenever they feel like it. With gentle encouragement, journalling can become a lovely mindful habit that grows with your child over time.


    Materials Needed

    • Notebook, journal, or blank paper
    • Pen, pencil, crayons, or coloured pens
    • Optional: stickers, washi tape, or stamps for decoration

    Tools Needed

    • None

    Steps

    1. Choose a Journal
      Pick a notebook or folder that your child enjoys using — let them decorate it if they like!
    2. Pick a Prompt
      If they need help getting started, offer a simple question (see ideas below).
    3. Encourage Expression
      Let your child write, draw, or even stick in photos or small mementos.
    4. Make it a Routine
      Set aside a regular time, like before bed or after school, to reflect and write.
    5. Keep it Private (if they wish)
      Let your child choose whether they share their journal or keep it for themselves.

    Journal Prompt Ideas

    • What was the best part of your day?
    • What made you smile today?
    • What’s something you’re looking forward to?
    • Draw a picture of how you feel right now.
    • What’s one thing you learned today?
    • If you could go anywhere in the world, where would you go?
    • Write about your favourite hobby or game.
    • Describe someone who makes you feel safe.
    • Write down one thing you’re grateful for.

    Variations

    • Gratitude Journal: Write or draw one thing each day they feel thankful for.
    • Drawing Journal: Younger children can draw pictures instead of writing words.
    • Travel Journal: Write entries about trips, days out, or special activities.
    • Sticker Prompts: Use themed stickers as inspiration for that day’s entry.
  • What’s the Time Mr. Wolf

    What’s the Time Mr. Wolf

    What’s the Time Mr. Wolf is a simple, energetic game that helps children practise counting, listening and quick reactions — all while having plenty of fun outdoors.

    It’s great for burning off energy and works well with small groups or bigger gatherings like birthday parties or playdates.

    The simple structure makes it easy for even young children to join in, and it can be played just about anywhere there’s a bit of open space.


    Materials Needed

    • None

    Tools Needed

    • None

    Steps

    1. Choose the Wolf
      One person stands at one end of the playing area — they’re the Wolf. Everyone else stands in a line at the other end. The Wolf turns to face away from the rest of the players.
    2. Ask the Question
      The group calls out, “What’s the time, Mr. Wolf?” The Wolf replies with a time (e.g. “3 o’clock”).
    3. Take Steps
      The group takes that number of steps forward.
    4. Surprise Moment
      At any time, instead of a time, the Wolf can shout “Dinner time!” and chase the others back to the starting line.
    5. Start Again
      If the Wolf tags someone, that person becomes the new Wolf for the next round.

  • Sand Volcanoes

    Sand Volcanoes

    Sand Volcanoes are a brilliant way to mix building fun with a bit of science-inspired imagination.

    Kids can shape their own volcano using damp beach sand, forming a cone with a crater at the top — just like the real thing. Pouring water into the crater mimics a lava flow, adding excitement and sensory play to the experience.

    This activity is perfect for beach play and invites children to experiment with shaping, stability and storytelling all at once.


    Materials

    • Damp sand
    • Bucket or container of water

    Tools

    • Hands or small spades (optional)

    Steps

    1. Choose a patch of damp sand and begin shaping it into a mound or cone.
    2. Use hands or a small shovel to carve out a crater at the top — this will be your volcano’s mouth.
    3. Carefully pour a little water into the crater and watch it flow down the sides like lava.
    4. Experiment with adding more water or reshaping the volcano to see how the flow changes.
    5. Optional: Decorate your volcano with seaweed or shells for added flair!

    Variations

    • Baking Soda Eruption: Add a small plastic cup in the crater and fill with baking soda and vinegar for a foamy reaction (bring ingredients from home).
    • Mini Volcano Village: Build a town or landscape around your volcano and tell a story.
    • Coloured Lava: Mix a drop of food colouring into the water to enhance the “lava” look.

    Why It’s Great

    • Combines STEM and Creativity – Explore shape, erosion and flow while building a story around it.
    • Great for Team Play – Fun to build and experiment with as a pair or group.
    • Open-Ended Fun – Kids can adapt the volcano and landscape however they like.

    Safety Tips

    • Supervise children near water and encourage pouring water away from others.
    • If using baking soda and vinegar, keep the mix well-contained and avoid contact with eyes.
    • Ensure the volcano area is clear of sharp shells or hidden rocks.
  • Duck Duck Goose

    Duck Duck Goose

    Duck Duck Goose is one of those timeless group games that never goes out of style. Children sit in a circle while one walks around tapping heads—“duck, duck, duck…”—until suddenly: “goose!” The chosen child jumps up and chases them around the circle, trying to tag them before they grab the empty spot.

    It’s fast, silly, and a brilliant way to help children practise turn-taking, listening, and moving their bodies with confidence. No prep, no props—just lots of giggles and a bit of healthy chaos!


    Materials Needed

    • None

    Tools Needed

    • None

    Steps

    1. Form a Circle
      Children sit on the ground or floor in a circle, facing inward.
    2. Pick a Tapper
      One child stands up and walks around the outside, gently tapping each head and saying “duck” as they go.
    3. Say “Goose!”
      At any moment, the tapper calls “goose!” and runs around the circle.
    4. Time to Chase
      The “goose” jumps up and chases the tapper, trying to tag them before they sit in the empty spot.
    5. Switch Roles
      If the tapper sits down untagged, the goose becomes the next tapper. If they’re tagged, they go again.

    Variations

    • Theme It: Use different words like “cat, cat, dog” or “pizza, pizza, broccoli” to match interests or learning themes.
    • Quiet Goose: For indoor or calmer settings, try a version using hand taps and whispers instead of shouting.
    • Freeze Tag Twist: After “goose” is called, the chaser has to freeze mid-run for a second before taking off.
    • Small Group Mod: With fewer players, use soft toys or cushions as stand-ins to complete the circle.
  • Anything Boules

    Anything Boules

    Anything Boules is a playful twist on the traditional French lawn game. Instead of metal boules, players use random household objects—think socks, Lego/Duplo bricks, toy blocks, or even rolled-up paper balls. The goal remains the same: toss your item as close as possible to a target, usually called the jack.

    Because the objects have unpredictable shapes and weights, every round is full of surprises, laughter, and chaos—in the best way! It’s a great indoor or outdoor game for developing hand-eye coordination, turn-taking, and friendly competition, with zero special equipment required.


    Materials Needed

    • 1 small target object (the jack) — a button, coin, or ball

    • 3–6 throwable items per player — e.g. rolled-up socks, Lego/Duplo bricks, blocks, scrunched paper, plastic animals


    Tools Needed

    • None


    Steps

    1. Choose a Jack: Place a small object a few feet away to serve as the target.

    2. Pick Your “Boules”: Each player selects 3 (or more) throwable items. The wackier the shape, the more fun!

    3. Take Turns: Players take turns tossing their items, aiming to land as close as possible to the jack.

    4. Score the Round: The item closest to the jack scores 1 point. Continue playing rounds to a set total (e.g. first to 10 points).

    5. Add Obstacles (optional): Set up cushions or boxes to throw around or bounce off for extra challenge.


    Variations

    Weirdest Objects Wins: Award bonus points for the most creatively strange “boule” of the game.

    Trick Shot Round: Players must throw from under the leg, behind the back, or while spinning.

    Team Play: Form teams and alternate turns, just like traditional pétanque.

    Theme Throwdown: Use only kitchen items, only toys, or only things that start with a certain letter.

  • DIY Top Trumps

    DIY Top Trumps

    Create Your Own Ultimate Card Battle

    Top Trumps is a classic card game where players compare stats to win cards—but when kids make their own version, it becomes even more fun and imaginative. Whether they’re into dinosaurs, superheroes, pets, vehicles, or even family members, kids can create and design their own themed decks from scratch.

    This activity combines drawing, writing, and number skills with competitive gameplay. It’s a great blend of creativity and logic—and once the cards are made, the game can be played again and again. Plus, it’s easily adaptable for different ages and interests!

    Materials Needed

    • Blank paper or index cards (or print a simple template)

    • Pens, pencils, markers

    • Ruler (optional for neat lines)

    • Scissors (if using sheets of paper)

    Tools Needed

    • None required (laminator optional for durability)

    Steps

    1. Choose a Theme: Let your child pick a topic they love—e.g. mythical creatures, space, sports, jungle animals.

    2. Decide the Categories: Choose 3–5 stats per card (e.g. Speed, Strength, Magic, Cuteness).

    3. Create the Cards: Draw one character/item per card, give it a name, and assign numbers (1–100) for each stat.

    4. Make a Full Deck: Aim for 10–30 cards depending on how long you want the game to last.

    5. Play!: Shuffle and deal the cards. Each player compares the top card’s chosen stat—the higher value wins both cards.

  • Pub Cricket

    Pub Cricket

    Submitted by Ross W. Submit your own activity here.

    This travel game is a source of many an argument – just as real cricket can be.

    It works best as you travel through rural areas in the UK and Ireland (maybe other places).

    The basic rules are:

    • You take it in turns to be “in”
    • If you are “in” and you see a pub sign that has legs on it, you score a “run” for each leg. So if you see “The King George” you get 2 runs. If you see “The Horse and Hounds”… well. (We make plurals equivalent to 2, so a “Horse and Hounds” would be 12 runs)
    • If you are in and you or someone else sees a pub sign with no legs on, you are out and the next person goes in.

    You will need to decide the precise nature of how the game works. Arguing about the rules is part of the “fun”.

    For example:

    • Do pubs without signs count? Or is it only signs?
    • Do you only count the legs shown on the sign?
    • Do you have to actually see the pub in question? Or is “The Unicorn -> 200yds” acceptable?
    • How do you score “Arms”? Is “The King’s Arms” zero runs and out because it’s a coat of arms? Or does the presence of the King count?
    • What even IS a pub? Do hotels count?

    The winner is obviously the person with the most runs at the end of the journey. Or when you’re all very annoyed with each other and decide to stop playing.

    A photo of a pub called "Shepherd & Flock"
    How many ‘points ‘runs’ would this pub score?

  • Would You Rather?

    Would You Rather?

    Would You Rather? is one of those wonderfully simple games that can spark lots of laughs and some surprisingly thoughtful conversations.

    All you do is take turns asking each other fun or silly questions where you have to choose between two options. There’s no right or wrong answer — just a chance to be playful and get talking.

    It’s ideal for filling quiet moments at home, breaking up car journeys, or livening up mealtimes. You can keep it light and funny for younger children, or add slightly trickier choices for older kids to think about.


    Materials Needed

    • None

    Tools Needed

    • None

    Steps

    1. Take Turns
      One person asks a Would You Rather question. The other person chooses which option they’d pick and explains why, if they want to.
    2. Swap Roles
      After answering, take turns coming up with new questions.
    3. Keep It Going
      Keep asking for as long as everyone’s enjoying it!

    Sample Questions

    • Would you rather have wings or a tail?
    • Would you rather eat ice cream every day or pizza every day?
    • Would you rather be able to talk to animals or fly?
    • Would you rather live in a treehouse or a castle?
    • Would you rather never have homework again or never have to tidy your room?

    Variations

    • Make Your Own: Let children come up with their own silly or creative questions.
    • Themed Rounds: Try holiday-themed, food-themed, or animal-themed questions.
    • Quick Fire: Play a speed round where answers have to be given quickly.
    • Draw Your Answer: For younger kids, draw pictures to show their choices.
  • Beach Can Knockdown

    Beach Can Knockdown

    Beach Can Knockdown is a satisfying and simple game that invites kids to aim, throw, and cheer each other on.

    All you need is a can, plastic cup, or other non-breakable object to set up as a target, and some small pebbles to toss.

    It’s quick to set up, doesn’t require any special equipment, and works brilliantly as a competitive or solo game. Plus, it helps develop hand-eye coordination and patience — disguised as beachy fun!


    Materials

    • A can, plastic cup, or other safe target object
    • Small pebbles or similar safe, throwable objects

    Tools

    • None

    Steps

    1. Choose a flat area of sand to set up your target (e.g. a can, cup, or similar item).
    2. Mark a throwing line at an appropriate distance for your child’s age.
    3. Each player takes turns throwing pebbles to try and knock over the target.
    4. Reset the target each time it’s knocked down, and count how many throws it takes.
    5. Play for points, take turns, or see who can knock it down in the fewest attempts.

    Variations

    • Multi-Target Setup: Use several objects and assign different points to each.
    • Distance Challenge: Move the throwing line back after each success.
    • Timed Game: How many knockdowns in 1 minute?

    Why It’s Great

    • Develops Coordination – Encourages aim, control, and focus.
    • Simple and Flexible – Easy to adapt for different ages and group sizes.
    • Classic Fun – Great for friendly competition and beach down-time.

    Safety Tips

    • Make sure the throwing area is clear of people and pets.
    • Choose soft, rounded pebbles and lightweight, non-breakable targets.
    • Supervise younger children, especially near the water.
  • Superheroes & Villains

    Superheroes & Villains


    Save the Day with Imaginative Play!

    Superhero play gives children a brilliant outlet for big imagination, big energy, and big ideas.

    Whether they’re flying around the garden with capes, rescuing stuffed animals from imaginary danger, or teaming up to defeat a household “villain”, this kind of play builds confidence and cooperation.

    Kids can take on familiar roles like Spider-Man or Wonder Woman, or invent completely new characters with unique powers, costumes, and missions. It’s a fantastic way to explore themes like bravery, helping others, and creative problem-solving—all through play.


    Materials Needed

    • Blankets, tea towels or fabric scraps for capes
    • Paper, card, or masks (store-bought or homemade)
    • Toys to “rescue” or “protect”

    Tools Needed

    • Scissors and crayons (for designing masks or badges)
    • Optional: string, glue, or tape for costume crafting

    Steps

    1. Create a Hero Identity
      Let children choose their superhero name, powers, costume and mission.
    2. Make a Costume
      Use capes, masks, or badges to bring their characters to life. Keep it simple and safe.
    3. Invent a Villain
      Make up a harmless “bad guy” or problem that needs solving—e.g. rescuing a toy from the sofa volcano!
    4. Start the Adventure
      Act out missions, team up with other heroes, and save the day.
    5. Reflect and Celebrate
      Talk about what the heroes achieved. What made them brave? How did they work together?

    Variations

    • Hero Training Camp: Set up obstacle courses or challenges to test each hero’s skills.
    • Villain Role-Swap: Let kids play the villain for a round and flip the story!
    • Super Pet Sidekick: Add soft toy companions to help with missions.
    • Storybook Session: Write or draw comic-style stories based on their hero adventures.
  • Hopscotch

    Hopscotch

    Hopscotch is a brilliant mix of movement, number learning, and old-school fun. Drawn out with chalk or marked with tape, it’s easy to set up and just as fun for one child as it is for a group. It’s a great way to support coordination, balance, and counting skills, all while burning off a bit of energy.

    Whether you’re playing on the pavement outside your home, in the park, or even indoors with masking tape, hopscotch is endlessly adaptable and perfect for spontaneous outdoor play.


    Materials Needed

    • Chalk (for outdoor play) or masking tape (for indoor)
    • Small item to toss—stone, beanbag, button, or bottle top

    Tools Needed

    • None

    Steps

    1. Draw the Hopscotch Grid
      Use chalk to draw numbered squares (typically 1–9 or 10) in a simple pattern on the ground.
    2. Find a Marker
      Each player needs a small object to throw onto the grid. It should be light and safe but easy to see.
    3. Take Turns
      Throw the marker onto square 1. Then hop through the rest of the grid, skipping the square with the marker.
    4. Hop Carefully
      Hop on one foot for single squares and land with one foot in each box for doubles. Turn around at the end and return the same way.
    5. Repeat and Progress
      Next time, throw the marker onto square 2, and so on. If you miss or step outside the lines, it’s the next person’s turn.

    Variations

    • Shape or Colour Hop: Replace numbers with colours or shapes for a different learning focus.
    • Timed Hop: Use a stopwatch and see who can complete the grid fastest without errors.
    • Obstacle Hopscotch: Add small challenges like clapping, spinning, or hopping backwards between squares.
    • Indoor Friendly: Use masking tape on carpet or tiles and play with soft slippers or socks.
  • LEGO Challenge

    LEGO Challenge

    LEGO is one of those rare activities that works brilliantly for all ages and can grow with your child.

    A LEGO challenge adds structure to the usual free play and encourages kids to think creatively, solve problems and build their own designs.

    The best part? You don’t need any special sets — just whatever bricks you already have at home.

    These challenges are a great way to gently introduce kids to design thinking, teamwork, and persistence, all while having fun and being creative.


    Materials Needed

    • LEGO bricks or any building blocks
    • Flat building surface

    Tools Needed

    • None

    Steps

    1. Pick a Challenge
      Choose a challenge idea that suits your child’s age and interests (see ideas below).
    2. Set a Timer (Optional)
      If your child enjoys a bit of competition, set a timer for extra fun.
    3. Start Building
      Let your child take the lead, offering support or suggestions if they get stuck.
    4. Show and Tell
      Encourage your child to explain their build — what it is, how it works, and what they’d add next.
    5. Celebrate
      Take a photo of their creation before tidying up, so they can keep a record of what they’ve built!

    LEGO Challenge Ideas

    For Ages 3–5

    • Build a tall tower as high as you can.
    • Make a house for a toy animal or figure.
    • Create a colourful rainbow.
    • Build a simple bridge to fit a car underneath.

    For Ages 6–9

    • Design your own car, boat, or plane.
    • Build a castle or a space station.
    • Make a garden or park scene with trees and flowers.
    • Create a mini zoo or pet shop.

    For Ages 10–12

    • Design a working drawbridge or moving parts.
    • Recreate a famous landmark (e.g. Eiffel Tower, Big Ben).
    • Build a futuristic robot or vehicle.
    • Invent your own board game with LEGO pieces as the game board and counters.

    Variations

    • Blind Build: Give instructions or describe the build without showing a picture.
    • Team Challenge: Work together as a family to build a giant model.
    • Colour Challenge: Build something using only 2 or 3 colours.
    • Limited Bricks: Pick 20 random pieces and see what you can create.

    Safety Tips

    • Keep small pieces out of reach of younger siblings who may still put things in their mouths.
    • Supervise children while building to help avoid stepped-on bricks or accidental spills.
    • Store LEGO safely after play to prevent any unexpected barefoot surprises!
  • Start a Jigsaw Puzzle

    Start a Jigsaw Puzzle

    Starting a jigsaw puzzle is a brilliant way for children to slow down and engage in focused, screen-free play. Whether working solo or as a team, puzzles help develop problem-solving, spatial awareness, patience, and perseverance—all while providing a satisfying sense of progress.

    They’re also wonderfully flexible: you can work on them for 10 minutes or an hour, leave them set up to return to, and choose from themes that suit every age and interest.


    Materials Needed

    • A jigsaw puzzle suitable for your child’s age and skill level
    • Clear, flat surface or puzzle mat

    Tools Needed

    • Optional: sorting trays or containers

    Steps

    1. Choose a Puzzle
      Select a puzzle with an age-appropriate piece count and theme your child finds engaging.
    2. Sort the Pieces
      Flip all pieces picture-side up and sort edges from middle pieces.
    3. Build the Border
      Start with the edge pieces to form the frame of the puzzle.
    4. Work in Sections
      Group similar colours or features and build small sections at a time.
    5. Take Breaks and Enjoy
      Puzzle-solving takes time—pause and return later if needed!

    Variations

    • Puzzle Race: Time how fast you can complete a puzzle, or race with a friend using similar sets.
    • DIY Puzzle: Draw a picture, glue it to card, and cut it into puzzle pieces.
    • Reverse Challenge: Try doing a familiar puzzle without using the picture for reference.
    • Giant Floor Puzzle: For younger kids, try a large-piece puzzle they can assemble on the floor.

  • Draw a map

    Draw a map

    Drawing a map is a fun and imaginative way for children to explore their surroundings or invent their own worlds.

    Whether they’re sketching a treasure map, designing a make-believe island, or mapping out their own bedroom, this activity blends art, storytelling, and observation.

    It also supports spatial awareness, directional language, and planning—all wrapped in a creative task that’s completely customisable.

    Maps can be as simple or detailed as your child likes, and you can even turn them into games later on!


    Materials Needed

    • Plain or coloured paper
    • Pencils, pens, or felt tips
    • Optional: ruler, stickers, tea bags (for ageing pirate maps!)

    Tools Needed

    • None

    Steps

    1. Pick a Theme
      Decide what kind of map you’ll create: your home, your street, a pirate island, or a magical land?
    2. Sketch the Outline
      Draw basic shapes to mark out key locations—rooms, paths, landmarks, or zones.
    3. Add Details
      Label places, draw trees or buildings, and include fun features like monsters, treasure, or secret doors.
    4. Decorate
      Colour in your map, add a compass rose or a border, and age the paper for a vintage look if you like.
    5. Share Your World
      Use the map for storytelling, treasure hunts, or just display it proudly.

    Variations

    • Treasure Hunt Map: Hide an item and mark it on the map with an X—then challenge someone to find it.
    • Fantasy World: Draw a magical kingdom or alien planet complete with landmarks and rules.
    • Real-World Mapping: Take a walk and map your route through the park or local area.
    • Group Map: Work together to build a giant map on a big sheet of paper or multiple joined pages.
  • Yellow Car! No returns!

    Yellow Car! No returns!

    “Yellow Car; No Returns” is a quick, light-hearted spotting game that needs no setup, no gear, and no explanation—just sharp eyes and a playful spirit.

    Whenever someone sees a yellow car, they shout it out first! The added rule of “no returns” means once you’ve called it, it’s yours—no take-backs, no second chances.

    It’s ideal for keeping kids entertained during long car journeys, while waiting for buses, or even walking down the street. It helps develop observation skills, quick thinking, and friendly competition—without ever needing to press pause on your day.


    Materials Needed

    • None

    Tools Needed

    • None

    Steps

    1. Spot a Yellow Car
      The first person to see a yellow car shouts “Yellow car!”
    2. Add ‘No Returns’
      To make it official—and cheeky—add “No returns!” so no one else can claim the same car.
    3. Keep Score (Optional)
      For longer journeys, keep tally marks to see who’s spotted the most.
    4. Play Anytime
      This game works whether you’re walking to school or stuck in traffic—it’s as quick or long as you want it to be.

    Variations

    • Different Colours: Switch it up—try red cars, white vans, or rainbow cars for variety.
    • Themed Rounds: Add new rules like “must spot a car and name its make or model” for older children.
    • Funny Forfeits: Miss a really obvious yellow car? The rest of the group can give you a silly (friendly) challenge.
    • Walking Challenge: Turn the school run or a family stroll into a colour-spotting game.
    • Horse: Shout “Horse!” when you see a horse. -1 point if it isn’t a horse. Lose all your points if it’s a Llama. (as seen here: https://www.youtube.com/watch?v=ceZJE7zSYHs&t=524s via Ross W.)